Monday 9 July 2012

Pinterest Project - Strawberry Pincushions

I pinned the strawberry pincushion quite some time ago having seen the darling ones made over at nanacompany (pictured below). If you haven't visited the blog then you must! It is picture heavy though and if you are using a horrid chugging piece of crap like I do then you will simply have to be very patient!
Worth it though, you will be so jealous at  Amy's beautiful embroidery and hopefully a bit inspired too :)


So anyway, at some point in time after pinning those beauts I saw this photo tutorial for the strawberries and it looked easy so I made some. Not as good as Amy's, or those in the tutorial pictures, but they are first attempts so I will make better ones next time.


The best bit is that these use up so little fabric you can make a whole army of them!
I embellished with white pearlescent flower sequins and gold beads found in my stash, and I only used scraps of fabric for the strawbs so didn't involve any monies jumping outta my purse!


I have pinned a tutorial from purlbee for some strawberry cushions, basically the same as these but huge! When I get around to buying the fabric I will post them up with a size comparison!

Tuesday 3 July 2012

Pinterest Project - Socktopus


I saw these cuties on Pinterest and just had to! I mean, how could you not when they are so simple?

All you do is hunt out those old/odd socks, long ones work better, snip the foot part of the sock off (unless you are using tube socks or even old tights), turn it inside out and sew a running stitch along the top and pull closed (secure it with a few stitches through the middle). Stuff with scrap fabric, toy stuffing or even carrier bags. Sew closed and snip the rest of the sock into 8 strips for the legs! Add facial features and any other embellishments and you are good to go!
Took about 20 minutes each (I was not hurrying, you could probably do them quicker) and now I want to cut up all of my socks!
You could take it further with the embellishments and use a plain sock to decorate.


Not bad hey?!

Sunday 1 July 2012

Chocolate Cupcakes

Everyone needs a chocolate cupcake hit every once in a while, especially when the chocolate cupcake is from the ultimate chocolate cake recipe! I have made many recipes for chocolate cake but this one wins for me hands down EVERY FRICKIN' TIME! Sourced from the Good Housekeeping Simple and Stunning Cakes book by Greg and Max. For some unknown reason this is the only recipe I have made from this book, maybe I subconsciously thought it was the magnificent octopus (Magnus opus for those who don't get the Blackadder reference!) of the book and the rest would pale in comparison, who knows?


They were decorated with chocolate fudge icing, marshmallows dipped in the coloured sugar I previously posted about and a few store bought sugar butterflies.

I prefer to use chocolate ganache to frost my chocolate cupcakes with but as I stupidly delayed making these the bloody cream went out of date and it was too late to go get some more.


Anyway, these tasted awesome and maybe one day I will share my recipe.... when I have a better one to remain the supreme chocolate cake maker of the universe mwahahaha!

Saturday 30 June 2012

Dessert...

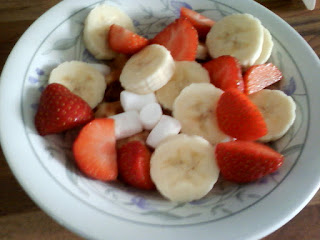
Looks pretty healthy here... Bananas and juicy strawbs....

But hidden in the bowl are marshmallows, chocolate, and a waffle....
...Which means STRAWBERRY AND BANANA S'MORE WAFFLES!!!!!


Yeah, I was pretty pleased with this invention ;)

Where did the time go?!


Apologies to anyone who actually reads the blog, I think I must have fallen down a rabbit hole and ended up almost in July! Posting will recommence shortly!


Tuesday 15 May 2012

Pinterest Project - Coloured Sugar

Who doesn't love the virtual crack that is Pinterest?!
It is a fantastic way of keeping track of future projects, design ideas, recipes etc etc. However, it is all to easy to get carried away with the whole pinning part and never get around to the doing part.
I started my Pinterest account to try and organise my ever growing bookmarked web pages, then I got addicted!
So to try to keep up with the doing part of pinning ideas, I will post up things I have pinned that I have got around to. And let you know if, in the words of a blog I read somewhere amongst the ether, did I pin a win?!

First up, DIY coloured sugar.
I found this by random from a blog party link and it hit me as a great money saver and a cute project.


Source: http://www.momontimeout.com/2011/11/how-to-make-your-own-colored-sugar_18.html


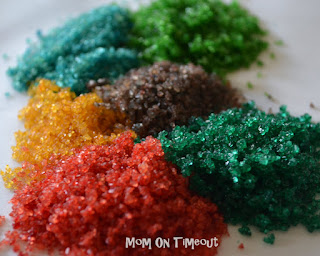
It is pretty easy to do, put a few tablespoons of sugar (I used both caster and granulated in my experiment, as well as some dessicated coconut) into a jar, add 2 or 3 drops of food colouring, screw the lid on and shake. Shake and shake and shake until the sugar magically has turned a cute colour!
Easy as that folks! Excuse the rubbish photo, you know the drill with my photography equipment/skills!


So overall, did I pin a win? Yes, yes I did! This would be a fun activity to do with children and will save you money if you are into the cake decorating game, not to mention the bingo wing toning from all the shaking!

Enjoy!

Monday 14 May 2012

Get A Life!


Just a quickie here ;) I found what I like to call "Mario green" wool and whipped up a 1up mushroom to add to the growing collection of Mario crochet. Pattern is the same as the one used here.

Sunday 13 May 2012

Zombie Pin-up Embroidery - Work In Progress!

Hey folks! I have started my embroidery now, having got hold of the hoop to stretch the canvas.
I have to confess I'm a little late in posting this up and am almost finished with this part! I am really pleased with how it is turning out, I'm mostly using satin stitch here so it is a lot like colouring in the lines!
I hope to embroider more than just the zombie as I feel it will look a little bare when turned into a fancy lined and partitioned tote for summer usage.
I might try some other embroidering techniques as well to help achieve a good understanding of all the basics.
You can refresh your memory of the original drawing here.


It goes to show that you should never worry about trying something new, just jump in and give it a go - you might just surprise yourself!

Monday 30 April 2012

Cute Cupcake Card

Found this picture on my phone so thought I would share it!
A very old card that I made for a friend's birthday, simple but cute.


In the background you can see a fairly tidy desk... Well for me anyway!!


More posts are on their way, April has been such a busy month!

Tuesday 10 April 2012

Pineapple Cake

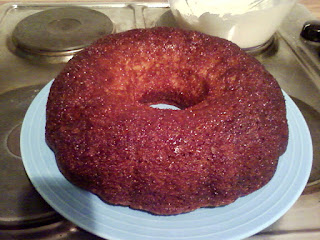
This is a cake I made a while ago, recipe taken from Jenn at Eat Cake For Dinner. It is a fat free (as in no butter or oil went into the recipe) and you would never be able to tell! It is really moist, sticky (the colouring of it is basically caramelised pineapple) and really delicious!

Isn't it a beast?! I used the ring tin just because I had got it from Lakeland (Mmm quality quantum 4 Teflon....) and couldn't wait to use it :) It took a lot more time in the oven than the recipe said because of this, Jenn made hers in a sheet cake tray I think. I made some dream topping to serve it with but a better option would be custard, it is a very puddingy cake.
So for a guilt free pudding I really recommend this one, it used a whole tin of pineapple so you could probably reason that you can get one of your five a day ha ha ha!

Monday 9 April 2012

Upcycled Jeans -> Pouffe - No Spend Project!

Hope everyone is enjoying their bank holiday weekend!
Here is a little project that was 90% completed on new years eve (Yep...I'm that cool ha ha ha!) and finished about a month ago. It is a pouffe made from old jeans, it is completely eco/ purse friendly though because it is filled with spare bedding - duvets and pillows. I was actually going to buy some of those vac pack bags to store the duvets in as they were getting on my nerves being thrown from one cupboard to the next taking up so much space. We hardly use them and if we need them then they can be whipped out of the pouffe ready for action!
As you can see from the pictures, I made up a large circle out of wedge shapes cut from the old jeans and disguised the hole with a circle making an attractive sun pattern. I basically sewed the pieces together with a straight stitch then used a zig zag stitch and top stitched for strength. It is, after all, going to have arses a plenty on it.


The side panels were made up of alternate rectangles and two piece rectangles, there is only so much fabric on a pair of jeans so I had to fit bits in where I could! I seamed it together as before then zig zagged the hell outta it as these joins will be under more strain.


For the bottom I used larger wedge pieces, this was where the 90% complete stage was, I wanted to use it new years eve and therefore safety pinned the bottom up... and left it!
Eventually I got around to finishing it and sewed on Velcro to fasten the flaps down, it is pretty strong, it doesn't fall open when it is picked up.


Well, I would recommend everyone make one, it is a bit time consuming but it is satisfying to know it cost nothing and is a handy storage facility! You could try making a smaller one as a footstool, perhaps fill it with a few pillows if you don't have spare duvets kicking around.

Hope this has given some inspiration on upcycling jeans :)

Happy Easter!

Friday 6 April 2012

Steampunk Inspired Card

Hey guys!
I don't often take photos of cards I make, I just forget to! Sometimes I do remember and this is one of those times. I made this a while ago for a friend's birthday, I had seen the card toppers in a local craft shop and had to get them, there were four in the pack and I had two people in mind for using them (which I did) but I forgot to take a picture of the other one!

As you can see, I layered the topper on to a blank card covered in brown paper. I gave the card some glitter, added stars on foam pads, glued a little heart and a feather to the hat, added some letter stickers and a stopwatch then used a transfer to complete the happy birthday message.

Here is a closer view of the glitter and stars, you can really see the quality of the topper design in this picture.

And to finish off, a blurry picture showing the Happy Birthday message.

If you see these toppers in your local craft shop I highly recommend them!

Tuesday 3 April 2012

Octodogs = AWESOME!!!!

Despite being in my twenties, I sometimes make these for my lunch! Octodogs are the way forwards!
My amazing friends got me a bento box from Japan which is super kawaii and I proceeded to make ridiculous lunch...it's just how I roll ;)
I also make fake sushi with sandwich fillers and tortilla wraps, I'm not a fan of the genuine variety!

Monday 2 April 2012

T-shirt Decoration

Hey guys! I don't know about you but when it comes to vest tops and t-shirts, I tend to stick with black and plain. I'm boring and frightened of colour ha ha ha!
In an endeavour to jazz things up a little but still have a "plain" daytime look, I decided to embellish a couple of tops in my wardrobe (and with the price of a t-shirt nowadays if you create something hideous then you can chuck it in the scrap pile and start again!).

First up is a simple button and sparkly hot fix crystal affair (Seriously, if you have not investigated the Kandi Kane yet then I urge you, in the name of sparkles, to check it out!). I dug out some similar sized buttons all in purple shades from my button box, well I say dug out but my button box is totally organised into colours so it was less digging, more selecting ;) I was uber anally retentive and made sure my buttons were in the order of 2 hole, 4 hole, 2 hole etc and spread them out equally. I then sewed them on with embroidery thread. Finally I positioned the crystals between the buttons and heat fixed them to the top. I would recommend putting a book or something in between the layers of the top to stop them sticking together when the glue is all melty.


Here is a close up.

On a different top I had a go at a simple freehand embroidery, meant to be cherries btw....
Anyway, I got the idea for button fruits from the mistress of divine knowledge Martha Stewart, I just was a bit kinda gung ho about it so it looks a bit crap! In my defence it looks weird because the picture is the wrong way around but I am far too lazy to turn it around at this point!


Last but not least, floral decoration in black, naturally. There are flower tutorials all over the internets, I used THIS ONE from the uber adorable Disney at Ruffles and Stuff. It says no sew flowers but I sewed them in absence of a hot glue gun.
*On an unrelated note, don't you just hate people who have no courtesy when parking?! My neighbours drive me up the bloody wall with their selfish parking, joke will be on them when they have blocked me in and I have to go somewhere and bash my way out! Sorry, I have just watched one of my neighbours reverse right up to my front bumper with 2 inches to spare and I shan't be surprised if the same thing happens behind me before the night is over - GRRRR!!!*
Right, err, yeah.... So I sewed the flowers onto the top in an aesthetically pleasing multi sized trio.
Takes longer than the first two but is cuter :) The flowers can be made to go on anything so a useful tutorial to memorise.

So go forth and decorate!

Sunday 1 April 2012

Zombie Pin Up

Thought I would show everyone an idea in progress.
I was at work and listening to the radio, a song by the band The Feeling came on and as I was working away I heard the line "People in love their hearts get eaten" which is probably just misheard but it got my brain going!

I suddenly had this idea about a sexy zombie killing off her lover by going for heart instead of brains! I know this probably is not very funny to most people but my sense of humour is a bit odd and I thought it was fricking hilarious! So I thought of things I could do with this and decided that I wanted to do an embroidery as I wanted to do one and have no qualms about skipping the usual flowers and twee (I do like flowers and twee-ness, I just also like zombies :) ) for something a bit more ambitious.
So I drew a picture to get started with, I just need to wait to borrow (steal hahaha!) an embroidery hoop off my step Mum as I am on a not buying stuff for lent thing as consumerism seemed like a better thing to give up than chocolate. I am trying to use up things I already have as I have loads of craft and sewing stuff that should be used up a bit before I buy more anyway. I like to be thrifty and resourceful any way so it hasn't been too difficult, although there are a few things I would like to buy, I think that after lent I will cut down on purchases and use them as a reward for something I am doing, or rather not doing :)

Any how, I got the urge to pull out the pencil crayons and colour in my picture so I though I would post it up as an idea in progress, as soon as I get that hoop I'm gonna be on it!!


Don't steal my picture potential asses - I own all rights to my drawing!

I think I am going to turn my embroidery into a sewing machine cover or maybe a cushion, will have to wait and see!
After I had sat and coloured this in, I suddenly had the idea (whilst walking downstairs, ideas really do just come out of nowhere!) that I could draw zombie mermaids too! I got so excited about this totally awesome and hilarious idea that seeing as how my colouring in stuff was upstairs still (Upstairs is the ground floor where the living area is, downstairs is underground where bedrooms and craft rooms hide, it is cold and windowless in my craft room - boo!) I could jump straight in and make imagination reality!

Again, I own all rights to my picture sneaky thieving bumholes!

So umm yeah, I had a lot of fun :)

Watch out for an update once I have the hoop!  

Tuesday 27 March 2012

Random Gift Wrapping Ideas

As a Brucey bonus, I found some photos taken last year that were meant to be part of a gift wrap tutorial that never was and decided to post them.

Guess what is in this......
Could be anything right?
But were you expecting it to be this.....?!
Rolling up a folded tshirt makes it so much easier to wrap and disguises it too.


Stacking gifts and then decorating them is a way of getting your gifts to stand out.


Using fabric ribbons adds a luxury touch to gifts, you can also reuse it afterwards!


Well these gifts are all pretty plain but men don't always like things fussy and covered in sequins unless it is lingerie! I know these are all basic ideas but I thought I might as well post them as I had took the photos already :) Perhaps I will encourage someone who usually just covers things in paper to get a bit adventurous.

Before I go there is just one thing left to say - USE DOUBLE SIDED TAPE!!!! (Never fails to impress ;) )

Monday 26 March 2012

Wine Bottle Wrapping Tutorial

Hello folks! If you know me personally you will most likely have received a spiffy looking gift at some point. Not to toot my own horn too much but I am at one with the gift wrap, I make my gifts look nice because I can't always afford an expensive gift and the wrapping distracts from this ha ha ha!
Here is a little tutorial on how to wrap up a wine bottle, one of those tricky shapes that come up time and time again and you don't always want to leave it naked in a gift bag!
Please ignore the state of my craft room carpet, this was spur of the moment and therefore I didn't get the Dyson out first!

You will need some tissue paper, sellotape, some sort of string, curling ribbon or ribbon and any decorative bits and bobs if you want to bling it up.

STEP 1
Start off with the rectangular piece of tissue paper in front of you with the longer side closest to you. Bring the bottom right corner up towards the top left corner until you have made this funny mountain shape. Turn the paper around so that it is facing you like it is in the picture.


STEP 2
Place your bottle about 2 inches from the bottom of the paper and about a third of the way in from the edge.

STEP 3 
Wrap the paper from the left hand side around the bottle then start rolling the bottle round, take care to keep it fairly tight.

STEP 4
Before you roll it too far along, tuck in the bottom of the paper. It doesn't have to be perfect!

STEP 5 
Fold across the end of the paper as shown. Then finish rolling up the bottle.
Secure the end with a small amount of sellotape, I would normally use double sided but it doesn't seem to hold the tissue paper in place very well. Use a couple more small pieces to secure the bottom, you don't need to go mad with it as the bottle will probably be upright which keeps it secure!

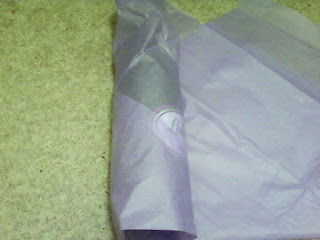
Your bottle should now look something like this!

STEP 6 
Tie the neck of the bottle with the string or ribbon.
Add bling.
You can't see in this picture but I added a large butterfly sequin to the neck where the curling ribbon is tied using sticky pads and glued some sequins onto the tissue paper.


I hope you have found this to be helpful! It isn't anything spectacular but is quick and simple yet looks really pretty. Obviously you can do this in any colour and decorate any way you like :)
I think it would look nice with a wide fabric ribbon tied around the neck in a bow. You could theme it for a wedding or do some whisky 007 style by making it look like a tuxedo with a bow tie! (This is just how randomly my ideas flow, I can't help it!) If anyone actually does this you totally have to let me know!!!

Have fun!

Sunday 25 March 2012

Jim Woodring Cushion

I made this ages ago, I can't even remember exactly when!
I must state now that I do not own the characters shown, all rights belong to Jim Woodring. 

It's a bit battered now due to going through the wash a few times! It is a Pupshaw and Pushpaw cushion.
Basically I traced an image off the computer screen (I have no printer ink!) and used that to make templates for the faces, I have used black fleece and scraps of the cream fleece the cushion cover is made from to construct an applique style face for each of them. (I cheated and used fabric glue instead of sewing them on.)

I then copied the rest of the picture on to the cushion using a black tulip paint that just had enough left in it - phew! I left it to dry overnight and voila, one Jim Woodring cushion that you won't find in the shops!

Saturday 24 March 2012

Cherry pies & Lemon and lime tarts

Well, it has been a while! Blogging is now back to business, things are on the up again and although you never really get over the loss of a loved one, it isn't good to stay in that sad place forever.
As I am in need of a good dose of distraction (for more than one reason...I will spill the beans soon enough!) I have been getting my craft on! I have also realised how many projects I never blogged about so I will be posting about them in the next few weeks along with posts about things in progress, recently finished projects and other random bits and pieces in the manner of which I am accustomed to doing :)

Right - enough chat, there is pie to discuss.

A few days ago I got bored and decided to bake, as is necessary. But sometimes one is not in the mood for something as laborious as cake. So I made lemon and lime tarts and cherry pies...

 Mmm cherries!
 The middle one got a bit excited!
Mmm limey.... Lime is totally the best flavour ever!

These were quick and easy, I will provide the sweet shortcrust pastry recipe below, it's pretty self explanatory how to construct pies and tarts, the beauty of it is that you can use plenty of things you probably have in the back of your fridge/cupboard, tarts work well with any marmalade or jam and are a good way to use up the end of a jar. There are so many fabulous jams out there it's a shame the humble jam tart doesn't get sexed up more often! I have used pineapple jam before which is really nice, for the next few batches I'm tempted by blackcurrant jam, cherry jam and coconut jam (known as kaya in some places, look for it in your local Chinese supermarket - it is to die for!).

SWEET SHORTCRUST PASTRY

Makes 8oz - I got 12 tarts and 7 pies from one batch.

8oz plain flour
5oz unsalted butter, softened
2tbsp caster sugar
1 egg yolk

Sieve the flour into a bowl, add the butter and rub into the flour. Stir in the sugar then form into a dough using the egg yolk and about 1tbsp of cold water. Wrap in some cling film or a sandwich bag and chill for 30 minutes before use.
Simples!


Linked up to THINK PINK SUNDAYS @ Flamingo Toes!

Friday 3 February 2012

Obsessed much...?

Banana cream pie cupcakes (or as a single cake) are the business! This is my go to recipe for using up bananas - I'm a weirdo who only eats bananas when they are green and therefore has ripe ones spare for baking more often than not! The concept of these bad boys comes from Jenn at "Eat Cake For Dinner" who always has the most amazing recipes :)
I used my own banana cake recipe and used the English equivalents of the other parts - hidden under the dream topping is banana angel delight (well, the Tesco version of angel delight)! I recommend you make these asap!


For those who have noticed the recent lack of posts, recent illness left me in no mood to post and the loss of my wonderful Nana will see it rather quiet on the blog front for a little while. I suspect that the newly implemented Made it Monday and Celebration Sundays will go, I feel that the Sunday posts in particular are not worth the time they take to be done on a weekly basis.
xxx

Monday 23 January 2012

Made it Monday - Red Velvet Cupcakes

As seen on yesterday's Celebration Sunday post, I used this recipe.
Now there were a few things that are not in my favour -
  1. I have never had a red velvet cake before so I have no idea what they are supposed to taste like
  2. I only have a 6 hole muffin tin
  3. This recipe makes 30 cupcakes
If you decide to make these cupcakes then I warn you, the ingredients will look shocking, a cup and a half of vegetable oil and 3 cups of sugar look like diabetes and CHD all rolled into one! Be sure to use a large bowl, the bowl I am using in the picture below holds 4.5 litres, it is pretty full!
When all the ingredients are combined the mixture is fairly runny, I used a ladle to fill the cases with.
The red food colouring (a whole bottle!!) hasn't stained my earthenware bowl but do be careful with plastic ones as they might go red! It is much more vibrant in err.... "person" so I wasn't expecting the results.


Oven shot - rising well and looking pretty red, nice example of how much mess I make when baking!


And the end result! The cakes were more brown velvet to be honest which was disappointing, I might experiment with powder food colouring instead or try to find a food colouring which is artificial, the silly natural ones do seem to lack the oomph of old school e-number versions.
Most important though is the taste...as I have no comparison I have no idea if they taste normal or not. I was worried they would taste vinegary but there is no hint of it! The cake itself is very light albeit with a crisp top, perhaps over baking on my part or something but it is not burnt in any way. I'm not sure what it tastes of, kind of neutral tasting really! I mean it does have a flavour but nothing distinct!
The frosting was made a bit runnier than it should have been because I couldn't be arsed to weight out the cream cheese when it was only a little bit over what it should have been anyway. The frosting should have a health warning of its own! Serious unhealthy goodness! A definite don't ask and I won't tell situation.
It is so good I honestly felt compelled to stick my face in the bowl (I restrained myself).

There are far too many to fit on my cake stand!


If anyone else has made red velvet cakes and can let me in on the colour secret I would love to know!

If you are from the UK and don't have US measuring cups then this website will allow you to convert the measurements, you need to be converting volume rather than weight.

Happy baking!