Hello folks! If you know me personally you will most likely have received a spiffy looking gift at some point. Not to toot my own horn too much but I am at one with the gift wrap, I make my gifts look nice because I can't always afford an expensive gift and the wrapping distracts from this ha ha ha!
Here is a little tutorial on how to wrap up a wine bottle, one of those tricky shapes that come up time and time again and you don't always want to leave it naked in a gift bag!
Please ignore the state of my craft room carpet, this was spur of the moment and therefore I didn't get the Dyson out first!
You will need some tissue paper, sellotape, some sort of string, curling ribbon or ribbon and any decorative bits and bobs if you want to bling it up.
STEP 1
Start off with the rectangular piece of tissue paper in front of you with the longer side closest to you. Bring the bottom right corner up towards the top left corner until you have made this funny mountain shape. Turn the paper around so that it is facing you like it is in the picture.
STEP 2
Place your bottle about 2 inches from the bottom of the paper and about a third of the way in from the edge.
STEP 3
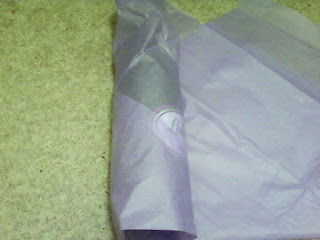
Wrap the paper from the left hand side around the bottle then start rolling the bottle round, take care to keep it fairly tight.
STEP 4
Before you roll it too far along, tuck in the bottom of the paper. It doesn't have to be perfect!
Before you roll it too far along, tuck in the bottom of the paper. It doesn't have to be perfect!
STEP 5
Fold across the end of the paper as shown. Then finish rolling up the bottle.
Secure the end with a small amount of sellotape, I would normally use double sided but it doesn't seem to hold the tissue paper in place very well. Use a couple more small pieces to secure the bottom, you don't need to go mad with it as the bottle will probably be upright which keeps it secure!
Your bottle should now look something like this!
STEP 6
Tie the neck of the bottle with the string or ribbon.
Add bling.
You can't see in this picture but I added a large butterfly sequin to the neck where the curling ribbon is tied using sticky pads and glued some sequins onto the tissue paper.
I hope you have found this to be helpful! It isn't anything spectacular but is quick and simple yet looks really pretty. Obviously you can do this in any colour and decorate any way you like :)
I think it would look nice with a wide fabric ribbon tied around the neck in a bow. You could theme it for a wedding or do some whisky 007 style by making it look like a tuxedo with a bow tie! (This is just how randomly my ideas flow, I can't help it!) If anyone actually does this you totally have to let me know!!!
Have fun!


No comments:
Post a Comment