Showing posts with label Misc. Show all posts

Monday, 25 August 2014

Sew Nice To See You....

I can't apologise any more for the bad blogging, we're all friends here so I can say that it stands at a "If I do, then I do; If I don't, then I don't" situation!
I have been busy beavering away, and as per usual it is my terrible photography (or should I say reluctance to be photographed) that stands in the way of a finished item becoming a blog post. BUT I have just had a fancy hair cut, and am on a diet for like the billionth time, so maybe I will feel a bit more confident about having my photo taken.

In the mean time, I hope you will all appreciate the latest addition to my fridge ;) You can never have enough Ryan Gosling!

Monday, 17 March 2014

Handbag Porn...

Seriously guys check out these beauties I found on Pinterest!!

These are all by designer Judith Leiber, and I am loving the unusual bling-tastic designs!

I doubt I will be able to hand-make anything this fancy, but I sure will be keeping an eye out for an old clutch I can bling up!

Thursday, 13 March 2014

7 Things You can Learn From The Sewing Industry


Hello everyone! Today I thought I would share with you a few tips that I have picked up whilst sewing in an industrial setting. I am no true veteran, nor am I an expert, but these are a few things I have picked up along the way that you might find useful :)

1 - Don't use as many pins!
I know that setting in a sleeve is best done with careful pinning, but for the most part, us home sewers are used to pinning everything abundantly. At work I have 12 pins in my pincushion (four of them are being used to attach my secret T-Rex to the other side of my frilly pincushion ;) ), they get used very rarely and off the top of my head I can only think of 3 or 4 reasons I use them. Most of the time it is on knee pad pockets (I work with industrial workwear mostly), and second most often is to hold something out of the way that keeps flopping down into my sewing area. If you pin everything, I challenge you to have a go at doing some straight seams without pins, like the sides of a skirt, or a trouser leg. I made a pair of pj bottoms the other day and didn't pin them at all!

2 - Use a craft knife instead of a seam ripper.
It is scary to put a knife to fabric the first few times, and I urge you to exercise caution when you are getting used to it - I don't want the blame for sliced fingers or sliced garments! But when you are unpicking a whole hem, especially on heavier fabrics, a craft knife just glides straight through and makes small work of overlocking etc. (Maybe the Sewing Bee contestants could have done with this tip!) Just start off by gently "stroking" the stitching with the blade and gradually increase the pressure until you are comfortable with using a bit more gusto. Be careful, but give it a try! Saves so much time in the long run.

3 - Replacing a zip is not scary!
Seriously, don't throw away those favourite jeans, or that cute jacket because the zip has broken. Take your time and remove the broken one, look at how you are taking it apart, and put a new one in. Once you get the hang of it, it will be no more daunting that putting one in a garment made yourself.

4 - Likewise for taking in trousers!
If you want to extend the life span of a pair of trousers that are getting a little bit loose, or just improving the fit of a new pair, then taking them in is a must. The easiest way is to unpick the waistband 3-4 inches either side of the butt seam. Then taper from about 2 inches above the crotch seam all the way to the top of the waistband. Fold the excess waistband to the inside, sew a seam down it, and sew it back round the trousers, folding the flap of taken in fabric the opposite way to the excess waistband fabric to minimize bulk. If you are certain you won't be gaining a few pounds then by all means cut it off! This will only work to a maximum of 2 inches on the fold (4 inches out of the waistband) as it starts to look a bit weird after that.

5 - Mark your hems with chalk.
This goes along with the use less pins really, but when taking up sleeves or trouser legs, just mark the fold line with a few dashes of chalk. No stopping to take pins out, just fold over and go!

6 - Put your pedal to the metal...
If you ever get the chance to use an industrial machine then you will notice how much faster it is than a domestic. Scary, but once you're used to it, sewing at home just seems to go so slow! I would reccommend to anyone that they practise going a bit faster, even if it is just for straight lines, it will get your garment together so much quicker allowing you to be more productive in the long run.

7 - Have a ruler put on your sewing table.

If you're lucky enough to have a dedicated sewing space with a table not used to host dinner parties, I would recommend getting either a transfer of a tape measure put on the edge of your table, or have a meter ruler attached. It makes it so much easier to check inside leg measurements (I actually have mine sharpied onto my sewing table at home!), zipper lengths, button widths... you name it! It is a small thing that will make thing a bit easier in the long run. It also has the added advantage of not stretching out like a tape measure will after time.

Well that's all I can think of at the moment, I hope some of them are at least a little bit of use to somebody! Feel free to leave more suggestions in the comments :)

Friday, 21 February 2014

Blogging...

....It would seem that I am stuck in between having no time to blog but being unable to give it up!
I even started a Kollabora account, but after a couple of days messing around with it have found that deserted too!

The lovely Rochelle over at Lucky Lucille has just posted about being in a funk, a very timely post as I am in the funk to end all funks right now and am finding it so difficult to do much other than aimlessly waste time. So I am taking her advice, and pulling myself out of it, one step at a time. Fingers crossed!

Monday, 21 October 2013

My Dream Come True...

It is no secret that I am in love with Dr Michio Kaku. He is my pretend boyfriend. For real. He built an atom smasher for his high school science fair project and is one of the founders of string theory - how could you not be besotted with such a man?! 
It is also no secret I love yarn. Almost as much as I love my imaginary fancy man. So when I saw this whilst watching SciFi Science on youtube, I almost died with the awesomeness of the situation!


So ladies, or gents if there are any out there reading, have you ever had a similarly glorious image of your pretend boy/girlfriend with yarn? I know there is a Ryan Gosling pic out there, and that is pretty awesome too ;)


p.s. I know I'm a bad blogger, it's back to O.U. for me now and the first month is always hectic! I have many things that just need a photo, and as I'm trying to improve those I have to wait for a weekend (for daylight!) when the other half is about to take the pics.

Monday, 23 September 2013

Russian Doll Tea Cosy

This is the first of my two entries to a local tea cosy competition, it is a crochet babushka/ matryoshka/ Russian doll (whichever term you like best!) cosy.

It was fairly quick to make, however, I was unaware that the deadline for this was being extended so I rushed the embroidery and am fairly disappointed by it.

It is based upon THIS pattern over at I'd Like To Be Original. When I made up the pattern as instructed it was huge so I adjusted it to be smaller. It is probably just me not checking tension or something, but it is easy enough to scale down.


I got to enter two cosies to the competition because of a low amount of participants, I won't have a picture of my other one until I go and collect them from the cafe at the weekend.

Any one else out there with the tea cosy bug?

Sunday, 8 September 2013

DIY Dressform

Hello everyone, this is another very quick post, and it is in response to the lovely Kelly over at Make, Sew, Do who asked in a post I just read, have you ever made a dressform?

The answer to this is yes! I made one a couple of years ago. Sadly I found the gaffer tape method to be a poor choice for keeping its shape and it has been disassembled and recycled/binned since the beginning of the year due to its lack of function.
So just for a laugh at my own expense, here is the evidence!

Apologies for the middle finger, I was not wanting to have a photo at the time!

Maybe one day I will make a gummed paper version, although maybe setting aside a little every month for a proper one some time next year is a better plan :)

Sunday, 1 September 2013

4 Suprising Places To Buy Yarn!


 Hello everyone!
Just a quickie here, but I thought I would share with you four places to buy yarn that you wouldn't have expected. Well, I can't promise that every store stocks it but it is certainly true for the ones in my town :)

1. Wilkinsons! Yep, the high street fave stocks yarn. Not the largest selection but you can still pick up some cheap DK weight for a bargain price, £1.35 for 100g according to their website.

2. B and M Stores - They had a good variety of colours, if memory serves right they stocked 100g DK and Baby yarn. Their website doesn't list it but I don't remember it being expensive.

3. Poundland - They stock DK weight in several colours, both in plain and sparkly. They are 3 for 2 and 50g balls. I have used this yarn and it is quite nice.

4. The Works - They stock a few different types of yarn, off the top of my head there is 100g DK and the yarn which is thin with pom pom type balls on it (I can't think of it's proper name!) along with another novelty type yarn also. The DK is £1.25, I'm not sure about the rest.

Are there any places you buy yarn that you wouldn't expect to find it in? Let me know in the comments!

Thursday, 22 August 2013

Patchwork Pot Holder

The Lincoln WI has its own offshoot craft group one Saturday a month at a local community cafe called Revival. Sometimes we bring our own projects in to work on, other times we have guests who teach us something cool. One Saturday it was a patchwork workshop, which I was very much looking forwards to as patchwork is something I haven't delved much into due to its fiddly and time consuming nature (or what I perceive to be time consuming and fiddly!).
 
We learnt a cool technique that can be done by hand (which we were) or machine. You basically sew two squares right sides together round the edges, snip a cross through the back, press, repeat with a larger square - et voila! You will have a fancy looking patchwork square!
You then pin a patchwork - wadding - backing sandwich together and stitch through all the layers in a manner pleasing to you.

I chose to add bias binding to mine and stupidly did not round the corners to make it look neater. It has dodgy top stitching but I will lie and say it adds homemade charm ;)
It has a little hanging loop on one corner as a pointless accessory due to its home in a drawer. I could tell additional lies that it enhances the aesthetics of the piece and makes chucking it in with the tea towels so much easier... but my nose doesn't need to get any bigger ha ha!

I will do a photo step by step tutorial thing on this method as it will be easier to follow than my mumbo jumbo description above.

If you haven't done patchwork before I highly recommend having a go this way, the speed of the results will be encouraging, and uber high precision is not as important as hexies or such like.

Adios! xxx

Tuesday, 20 August 2013

Cute Pencil Case

Hello everyone!
I'm sure you have seen those picture tutorials on Pinterest where there is no instructions just a series of self explanatory photos? Well here is my attempt at one!

It is a bit wonky (as comes as standard with my sewing) but considering I just winged it and drew an estimated shape on some a4 paper, it isn't too bad!

I made the bias binding myself from some scrap red linen.


The inside shows my wonky quilted effect lines, I didn't think to use a red bobbin, clearly I was having a moment...

The bottom is a bit misshapen as well.


Overall I am pleased with the result, not bad for a 100% winging it project! I also just really needed a pencil case for going to OU tutorials, having loose pens rolling round in my bag didn't seem like a good idea.

I would like to make another one at some point, perhaps a bit bigger though. They could be turned into make up bags, glasses cases, even a clutch bag. If you would like to see the original pin, it is on my projects board HERE.

Monday, 12 August 2013

Sewing And Body Image - My Two Pence

Sewing blogs periodically come around to this issue, and I guess I am jumping on the proverbial bandwagon now as my own body is something I am particularly struggling to deal with at the moment.
Last week I read THIS article on the Guardian website, written by a lovely blogger I follow, Karen at Did You Make That? where she talks about how making clothes from scratch freed her from the tyranny of ready to wear sizing numbers (12, 14, 16 etc) and let her appreciate the uniqueness of her body, perfect looking to others or not.
I have to confess my own thoughts couldn't be more different. Those tape measure numbers were/are
horrible. The first time I sized myself up for a pattern (free from Prima magazine, a much appreciated gift from my mother) I cried. At that time I was fitting into a size 14/16 bottom half and my top half varied with fabric due to my overly large bra size. The bloody tape measure told me to cut out the pattern larger than they had graded for. And the patterns go up to size 20. So I cut out the 20 figuring I would just use a smaller seam allowance and basted the bodice together, then basted on the skirt. I tried it on and it turned out to be huge. Really huge! I was relived by this but also confused at the relationship between the tape measure and the non stretch polycotton sack in front of me.

In time I came to understand about ease, big four patterns being very generous with the ease and how a perfect fit involves tweaking everything in relationship to my own shape and proportions. I also realised just how much the high street likes to massage the fragile egos of their clientele. I mean everyone knows a M&S 12 is much larger than a Topshop 12, but most people don't realise how much these sizes differ from pattern sizes.

Even now though, despite improved knowledge, I still get a sense of deep dread when I read those numbers off. It makes everything so much more real. My work trousers are sized in cm, this is just as depressing, it is a big number. I know that I am overweight, and until some personal circumstances interfered, I was slowly losing the weight to feel better about myself. but those numbers still haunted me. I had a hard time shifting the weight despite a 1 hour, 5 times a week gym habit (and no, I wasn't pigging out) and it took a long time to notice anything. I did track my actual weight loss, but I was primarily concerned with those darn numbers.

I guess what my point is really, is that personally, hiding behind that M&S 14 label (despite knowing its lying ways) makes me feel better that those raw, real, numbers. Even if no label = no evidence of size, I know, and my own opinion on my body is the only one that is truly important.


Thankfully cats do not have these worries!
(This is just an unfortunate angle, my cat is a chunky monkey but not that bad!)

Friday, 26 April 2013

Long over due blog award thank you post!

Last year the lovely and super talented Wendy from The Butterfly Balcony (Check out her blog, it's totally darling!) awarded me with not one, but TWO blog awards! Can you believe it?! And this is my very long over due thank you to her - Wendy, you're wonderful and you really made my day, thank you :)


So following Wendy's example I will be passing both awards along at the same time to the following people -
Charlotte from Heart's Cottage
Emily from The Cute Octopus
Nikki from Multibeavo's world
Maria from When Life Gives You Lemons
Sue from Sweet Pea Family Blog


And now for the (probably very boring) 7 facts about me....

1. I don't watch television! I do own a TV but it is used for computer games and DVD/VHS watching only. I do watch some TV shows such as Big Bang Theory and Desperate Housewives but on online catch up or DVD. I also watch science documentaries on online catch up because I'm a nerd haha!

2. I work as a "seamstress". It is killing off my love of sewing. I do not do glamorous dresses or anything fun, I repair and alter work wear (boiler suits etc). On the plus side of things I have a far better control of a machine (domestic machines seem so slow compared to an industrial!) and can put a zip in blindfolded!

3. I am a crazy cat lady - how could I not be with this fluffy munchkin?!


4. I have started up my own charity crafting organisation Hearts and Crafts. I have only managed to do one project so far due to a combination of being so busy and it being so difficult to find places which would like something other than money. I keep at it though and hopefully a new project will appear soon!

5. Nobody has ever taught me any of my crafty skills. If I want to learn to do something, I just do it! I highly recommend that if you are interested in any crafty hobby, that you just get on and dive right in! There are so many wonderful blogs out there with helpful hints and tips, not to mention you tube videos and the vast resource of pinterest there really is no need to wait!

6. I have a pet coconut. His name is Colin. I have had him for around 4 years now and he has featured on the blog before. Sometimes he gets a little wild....

7. I have a major book fetish! In our house there are hundreds of books, non fiction, fiction, graphic novels, art books, coffee table books......lots and lots of books! We really need more book shelves but have no room :( I have tried and tried to come up with a way to squeeze more in but folks, it just aint happening! I prefer to read non fiction nowadays, I just can't get enough of learnin' stuff ha ha!

So that concludes seven boring facts about me, which has taken about two hours to come up with. Lame I know. Any way, further thank you's to Wendy and I hope you all check out her blog and the ones which I have passed on the awards to.

Thursday, 25 April 2013

The Pledge

Sounds a bit ominous..... but thankfully I am talking about the Seamless Pledge - check out the funky button!
I stumbled upon this by chance from  a cute little blog I ended up at called Heart's Cottage and was intrigued. I will be honest, I don't really buy clothes very often, it stresses me out and my "particularness" means I rarely find anything I like enough to shell out for. I either make from scratch or upcycle existing clothes from my "uurgh, I am not feeling that anymore, I'll shove it in this box and get around to sorting it out later" pile. I will also have to exclude bras from this as I am on the hefty side of things so only NASA engineered over the shoulder boulder holders are good enough to stop my boobage from going wild! So other than the exclusion, perhaps the pledge is a little wasted on me. But I would like to join in anyhow so....

I, Lucy Lovell, take the Seamless Pledge, and vow not to buy any new clothes (except bras) and stick to the rules laid out below, until I sort myself out and am wearing a UK size 12 clothes. Once I have dropped the 2 dress sizes necessary I will re-assess my pledge and set another target. I would like to be free from the tyranny of corporation and this pledge is one facet of a multi-sided endeavour to become self sufficient and stick it to the man.


The rules -
  1. No buying new clothes for the duration of your pledge. By new, I mean any new mass-manufactured clothes.
  2. You can buy second-hand manufactured clothes – so be prepared to get to know your local charity shops awfully well.
  3. Vintage clothing is a-ok!
  4. Anything you’ve made by hand is definitely allowed. Get your sewing machines and your kntting needles out, because handmade is definitely in!
So what are you waiting for? Get involved and be inspired!

Saturday, 30 June 2012

Dessert...

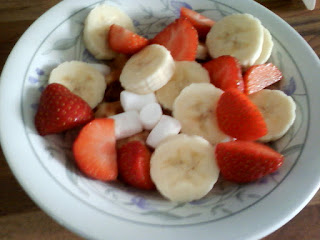
Looks pretty healthy here... Bananas and juicy strawbs....

But hidden in the bowl are marshmallows, chocolate, and a waffle....
...Which means STRAWBERRY AND BANANA S'MORE WAFFLES!!!!!


Yeah, I was pretty pleased with this invention ;)

Tuesday, 15 May 2012

Pinterest Project - Coloured Sugar

Who doesn't love the virtual crack that is Pinterest?!
It is a fantastic way of keeping track of future projects, design ideas, recipes etc etc. However, it is all to easy to get carried away with the whole pinning part and never get around to the doing part.
I started my Pinterest account to try and organise my ever growing bookmarked web pages, then I got addicted!
So to try to keep up with the doing part of pinning ideas, I will post up things I have pinned that I have got around to. And let you know if, in the words of a blog I read somewhere amongst the ether, did I pin a win?!

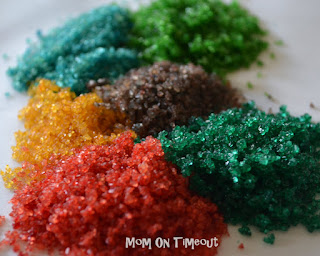
First up, DIY coloured sugar.
I found this by random from a blog party link and it hit me as a great money saver and a cute project.


Source: http://www.momontimeout.com/2011/11/how-to-make-your-own-colored-sugar_18.html


It is pretty easy to do, put a few tablespoons of sugar (I used both caster and granulated in my experiment, as well as some dessicated coconut) into a jar, add 2 or 3 drops of food colouring, screw the lid on and shake. Shake and shake and shake until the sugar magically has turned a cute colour!
Easy as that folks! Excuse the rubbish photo, you know the drill with my photography equipment/skills!


So overall, did I pin a win? Yes, yes I did! This would be a fun activity to do with children and will save you money if you are into the cake decorating game, not to mention the bingo wing toning from all the shaking!

Enjoy!

Tuesday, 27 March 2012

Random Gift Wrapping Ideas

As a Brucey bonus, I found some photos taken last year that were meant to be part of a gift wrap tutorial that never was and decided to post them.

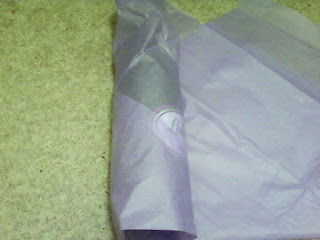
Guess what is in this......
Could be anything right?
But were you expecting it to be this.....?!
Rolling up a folded tshirt makes it so much easier to wrap and disguises it too.


Stacking gifts and then decorating them is a way of getting your gifts to stand out.


Using fabric ribbons adds a luxury touch to gifts, you can also reuse it afterwards!


Well these gifts are all pretty plain but men don't always like things fussy and covered in sequins unless it is lingerie! I know these are all basic ideas but I thought I might as well post them as I had took the photos already :) Perhaps I will encourage someone who usually just covers things in paper to get a bit adventurous.

Before I go there is just one thing left to say - USE DOUBLE SIDED TAPE!!!! (Never fails to impress ;) )

Monday, 26 March 2012

Wine Bottle Wrapping Tutorial

Hello folks! If you know me personally you will most likely have received a spiffy looking gift at some point. Not to toot my own horn too much but I am at one with the gift wrap, I make my gifts look nice because I can't always afford an expensive gift and the wrapping distracts from this ha ha ha!
Here is a little tutorial on how to wrap up a wine bottle, one of those tricky shapes that come up time and time again and you don't always want to leave it naked in a gift bag!
Please ignore the state of my craft room carpet, this was spur of the moment and therefore I didn't get the Dyson out first!

You will need some tissue paper, sellotape, some sort of string, curling ribbon or ribbon and any decorative bits and bobs if you want to bling it up.

STEP 1
Start off with the rectangular piece of tissue paper in front of you with the longer side closest to you. Bring the bottom right corner up towards the top left corner until you have made this funny mountain shape. Turn the paper around so that it is facing you like it is in the picture.


STEP 2
Place your bottle about 2 inches from the bottom of the paper and about a third of the way in from the edge.

STEP 3 
Wrap the paper from the left hand side around the bottle then start rolling the bottle round, take care to keep it fairly tight.

STEP 4
Before you roll it too far along, tuck in the bottom of the paper. It doesn't have to be perfect!

STEP 5 
Fold across the end of the paper as shown. Then finish rolling up the bottle.
Secure the end with a small amount of sellotape, I would normally use double sided but it doesn't seem to hold the tissue paper in place very well. Use a couple more small pieces to secure the bottom, you don't need to go mad with it as the bottle will probably be upright which keeps it secure!

Your bottle should now look something like this!

STEP 6 
Tie the neck of the bottle with the string or ribbon.
Add bling.
You can't see in this picture but I added a large butterfly sequin to the neck where the curling ribbon is tied using sticky pads and glued some sequins onto the tissue paper.


I hope you have found this to be helpful! It isn't anything spectacular but is quick and simple yet looks really pretty. Obviously you can do this in any colour and decorate any way you like :)
I think it would look nice with a wide fabric ribbon tied around the neck in a bow. You could theme it for a wedding or do some whisky 007 style by making it look like a tuxedo with a bow tie! (This is just how randomly my ideas flow, I can't help it!) If anyone actually does this you totally have to let me know!!!

Have fun!

Friday, 3 February 2012

Obsessed much...?

Banana cream pie cupcakes (or as a single cake) are the business! This is my go to recipe for using up bananas - I'm a weirdo who only eats bananas when they are green and therefore has ripe ones spare for baking more often than not! The concept of these bad boys comes from Jenn at "Eat Cake For Dinner" who always has the most amazing recipes :)
I used my own banana cake recipe and used the English equivalents of the other parts - hidden under the dream topping is banana angel delight (well, the Tesco version of angel delight)! I recommend you make these asap!


For those who have noticed the recent lack of posts, recent illness left me in no mood to post and the loss of my wonderful Nana will see it rather quiet on the blog front for a little while. I suspect that the newly implemented Made it Monday and Celebration Sundays will go, I feel that the Sunday posts in particular are not worth the time they take to be done on a weekly basis.
xxx

Saturday, 14 January 2012

It's all coming together!

Well readers, I have made progress with the scribbles on used envelopes!
Although there are many things still to be worked out, I have decided on a few definites to feature here.

The current line up will be -
* "Made It Mondays" - Things I have made.
* "Tutorial Thursdays" - Tutorials by myself and other crafters, also a few "round ups".
* "Celebration Sundays" - Homemade holiday preparation with inspiration posts, links to tutorials, my own projects and more!

I hope that starting off with a few themed days will keep the blogging ball rolling, sometimes when you're in a bit of an uninspired slump having a theme can help :)

If you have any thoughts about the themed structure or perhaps something you would like to see leave me a comment!

Saturday, 10 September 2011

Adventures with fabric dye - Part 1

STEP 1 - ASSEMBLE THE STUFF AND THINGS!


You will need - 
* One washing up bowl sized container that is no longer used
* One tablespoon of salt
* One packet of fabric dye for hand dying
* Plastic or preferably rubber gloves (these are important!)
* A stirring implement, I used an old paintbrush
* A smaller plastic container (not pictured)
* One really nasty coloured dress (which is a nice style)


STEP 2 - MIX UP THE DYE ACCORDING TO INSTRUCTIONS

I did not think to write down the instructions from the packet for this post as I am a fool!
Make sure to stir it up really well and not to splash it everywhere, a sensible option would be to place it on an old towel or some newspaper unlike myself who got it on the worktop - it came off thankfully as I was quick enough to spot it!


STEP 3 - FILL UP THE LARGE CONTAINER WITH WATER AND ADD SALT

It was also warm water for this dye, the instructions will reveal all to you!
If you have a curious cat shut them out of the room, Biggins nearly became a black cat due to her idiocy!


STEP 4 - ADD THE DYE TO THE WATER

Again, be careful to stir thoroughly and wear the gloves! I got a hole in one of my gloves and ended up with weird black stains for a few days!

STEP 5 - SUBMERGE OFFENDING GARMENT IN THE BLACK WATER

Poke it about a bit to ensure it is all covered with dye.
Then stir continuously for FIFTEEN MINUTES!!!
You will then need to stir it regularly according to the instructions, I had to do it for about 45 minutes.


STEP 6 - THROW IT IN THE WASHING MACHINE!

I didn't take a picture of my washing machine to add here..... I think everyone can use their imagination!

MOST IMPORTANTLY, READ THE INSTRUCTIONS PROPERLY!!
(I DIDN'T)

Find out what happened to the dress in part 2!