Our holiday to Switzerland was born of one idea - to visit the HR Giger Museum and Bar.
It was amazing, and luckily La Gruyere was a lovely medieval town to stay in also.
So we made more than one visit to the bar, but I asked for photos to be taken for bloggy purposes whilst wearing my all time favourite skirt. It looks like nothing special, because it isn't. A plain black circle skirt - magnificent! I love everything about it! I intend to make another a little bit longer as this is a bit short for those times when you need to be a bit more respectable ;)
So these pictures of me aren't the best I know. I was tempted to crop my head off and say it was eaten by an alien creature but it would probably have made it worse.... However, they are taken in the frickin Giger bar which makes up for it entirely!
The skirt is made from plain black cotton fished out of the oddments bin of a local shop, it was nice to work with although a little bit crisp, which made the skirt very poofy until it had been through the wash. I just used maths to make it, and it has a little zip and button closure at the back. It is not one for wearing in the wind, I had a Marilyn Monroe moment when we were in Geneva heading back to the airport. Thankfully I was wearing VERY large pants!
The t-shirt is a me made one, pattern made from an old tee, it is a bit too big across the back, hence the bra straps showing. But it does the job. Would you believe me if I said I had caught the sun whilst there?!
Here is a picture of some of the seating, I cropped myself out of the other half of the pic, but it is a nice shot of the interior of the bar, which will probably be the coolest bar I ever visit. The museum is right opposite the bar, but sadly no photos were allowed in there.
Hard to imagine a Cath Kidston print in here isn't it!
Showing posts with label Sewing. Show all posts
Sunday, 28 September 2014
Sunday, 21 September 2014
Of Course Culottes Count As Mountain Wear!
So I made some "Tania" style culottes... and wore them up a mountain!
I didn't climb the mountain though, I'm not that silly! We got to the summit of Le Moleson via funicular, then cable car.
The hem isn't as wonky as it looks I swear!
I self drafted the pattern, and aside from the fact these are made from a rayon blend something or other and crease like no-one's business, I love them very much. I am planning another pair for FESA in a heavier weight fabric, and will be lengthening them a little too.
To draft the pattern I used some funky maths, and traced off the crutch curve from simplicity 2700. The box pleat was right first time (I actually muslined this people!!) and for this pair I simply added an elasticated waistband because it is all about being comfy in the summer, and my weight is a bit here and there so I wanted to get more longevity out of them since I paid the princely sum of £6 a meter (don't laugh, I usually use bedsheets and curtains which are very cheap!) for the fabric. I should have written down what it was called really, but it is ever so soft and drapey.
It is dark grey in colour, which is my branching out from black. Grey is good, I can feel comfortable in it. I didn't do the wardrobe architect thing, but I feel pretty confident of my selection of neutrals - black, grey, and navy.
I wanted to get a shot of *the* secret crutch pose, but there were a fair few other people up there and I already looked odd enough without that!
I have been thinking about the ethics of copying an indie designers pattern, and have written a post about it which is coming soon.
It was very pretty up Le Moleson, even if it was cloudy.
But 2002m up is a bit scary for a girl from Norfolk ;)
I didn't climb the mountain though, I'm not that silly! We got to the summit of Le Moleson via funicular, then cable car.
The hem isn't as wonky as it looks I swear!
I self drafted the pattern, and aside from the fact these are made from a rayon blend something or other and crease like no-one's business, I love them very much. I am planning another pair for FESA in a heavier weight fabric, and will be lengthening them a little too.
To draft the pattern I used some funky maths, and traced off the crutch curve from simplicity 2700. The box pleat was right first time (I actually muslined this people!!) and for this pair I simply added an elasticated waistband because it is all about being comfy in the summer, and my weight is a bit here and there so I wanted to get more longevity out of them since I paid the princely sum of £6 a meter (don't laugh, I usually use bedsheets and curtains which are very cheap!) for the fabric. I should have written down what it was called really, but it is ever so soft and drapey.
It is dark grey in colour, which is my branching out from black. Grey is good, I can feel comfortable in it. I didn't do the wardrobe architect thing, but I feel pretty confident of my selection of neutrals - black, grey, and navy.
I wanted to get a shot of *the* secret crutch pose, but there were a fair few other people up there and I already looked odd enough without that!
I have been thinking about the ethics of copying an indie designers pattern, and have written a post about it which is coming soon.
It was very pretty up Le Moleson, even if it was cloudy.
But 2002m up is a bit scary for a girl from Norfolk ;)
Thursday, 18 September 2014
Sweetheart Leopard Print Dress
This is one of many of my unblogged makes, but since I got some good photos on holiday, I thought it was time to finally show everyone! I would like to point out that I will never be one of those bloggers who has half a dozen fabulous pictures with a post, but I hope you will agree this is an improvement! Do ignore the somewhat bleary face, I was horribly ill with a bad cold and trying my hardest to not give Rudolph a run for his money!
The dress in question was made from a mystery jersey, fairly heavy weight, not overly stretchy.
I think the pattern was one from Prima magazine, but I ended up changing it so much that you would hardly recognize it as being the same at all!
One of the biggest changes was to add the sweetheart neckline. I basically just gathered the neckline in at the sides as opposed to the more traditional method. This was because when I sewed it up, it wasn't right, and I had to play around with it to make it better. I'm pretty pleased with how it looks.
This dress is a go-to in my wardrobe, so comfy, is winter proof with a pair of leggings and boots, and also frees me of the need to wear a cardi when it is too warm.
My OH spent half of our walk taking silly photos of me walking along to make a bad animation from - this amused him highly, but does mean you can see the back of the dress too. Simple and unfussy, the business is going on at the back, and the party stays at the front.
I suppose it may look a little on the short side but I am only 5'2" so it doesn't seem too short.
Now...one down, only a hundred more "oh yeah I made this" posts to go....
The dress in question was made from a mystery jersey, fairly heavy weight, not overly stretchy.
I think the pattern was one from Prima magazine, but I ended up changing it so much that you would hardly recognize it as being the same at all!
One of the biggest changes was to add the sweetheart neckline. I basically just gathered the neckline in at the sides as opposed to the more traditional method. This was because when I sewed it up, it wasn't right, and I had to play around with it to make it better. I'm pretty pleased with how it looks.
The fabric isn't graduated in colour, it's just the shadow - although how fabulous would it be to have ombre leopard print?!
I also added in a different sleeve, my preferred slightly puffed elbow length one that I drafted for a shirt dress a long time ago, and have used for everything ever since - well when you know what you want, you simply have to go with it!This dress is a go-to in my wardrobe, so comfy, is winter proof with a pair of leggings and boots, and also frees me of the need to wear a cardi when it is too warm.
My OH spent half of our walk taking silly photos of me walking along to make a bad animation from - this amused him highly, but does mean you can see the back of the dress too. Simple and unfussy, the business is going on at the back, and the party stays at the front.
I suppose it may look a little on the short side but I am only 5'2" so it doesn't seem too short.
Now...one down, only a hundred more "oh yeah I made this" posts to go....
Monday, 15 September 2014
Cat Lady Sewing Challenge
It is no secret at all that I am a crazy cat lady! I love all the kitties! Especially my own purring princess....
So it will come as no surprise to see I am joining in with the Cat Lady Sewing Challenge, a genius idea from the lovely Miss Crayola Creepy.
It is quite a timely challenge as I recently was eying up some children's wear from Sainsburys featuring cats, and also have pinned a few things in the past over on ye olde Pinterest.
So decisions decisions.... off the top of my head the contenders are as follows -
* a circle skirt with kitties on the hem
* a dress with cat print fabric (although the fabric I like is a quilting cotton from Japan and I am way too tight to pay out for it!)
* a leopard print jacket (allowed to use leopard print but does feel a little bit like cheating!)
Well I will update when I am decided on what to do!
Is any one else joining in this fun challenge?
So it will come as no surprise to see I am joining in with the Cat Lady Sewing Challenge, a genius idea from the lovely Miss Crayola Creepy.
It is quite a timely challenge as I recently was eying up some children's wear from Sainsburys featuring cats, and also have pinned a few things in the past over on ye olde Pinterest.
So decisions decisions.... off the top of my head the contenders are as follows -
* a circle skirt with kitties on the hem
* a dress with cat print fabric (although the fabric I like is a quilting cotton from Japan and I am way too tight to pay out for it!)
* a leopard print jacket (allowed to use leopard print but does feel a little bit like cheating!)
Well I will update when I am decided on what to do!
Is any one else joining in this fun challenge?
Tuesday, 9 September 2014
FESA Plans
Hello!
Bit late posting this up as I was away on holiday last week (Switzerland; It was fabulous!) but here are my initial plans for FESA 2014 with bad illustrations to make up for the tardiness ;)
I am starting off cautiously, as I can always do more if there is time, so I won't be listing items for all categories.
First up is - Fashionable Foundations for Frosty Weather
Right, once you're finished giggling over the pics (it would have taken me weeks to draw these on a computer so I did it the old fashioned way with a pen, paper, and scanner) they are trousers btw!! :)
They will both be made with Simplicity s2700, with the pair on the right modified from the original pattern. LHS will be made up in black corduroy (in stash ready and waiting) with the heavier fabric supporting the wider leg. I hope. The RHS will be made from a grey stretch gaberdine, made to be more tightly fitted around the butt/thigh area.
This picture is my only imagining of how to draw the "Tania culotte" style culottes. I have yet to blog about it but I made my own pattern up for these, and have a lightweight summer pair in the wardrobe already. I am thinking a nice tweed? Lined? All up in the air at the moment, but I have been ogling some nice wool blends on eBay, and tossing up the pros and cons of making a pair of silky bloomers to wear underneath slip style, or just lining them making them cold weather only. Any help/opinions greatly welcomed here!
Next is Chic Chemises for Cooler Climates
Well the top one is meant to be a Myrna cardi (By the fabulous Andi Satterlund). I have one on the needles already in a charcoal grey, and it is a really great pattern, especially for a less advanced knitter such as myself. I have yarn to try and make a second one in black before FESA is over, but no promises!
The middle is a long sleeved t-shirt, which I will make with my own pattern, and perhaps also have a go with one of the free patterns available that I am probably one of the last bloggers to try! I love a plain black tee, and a longer sleeved selection (3/4 probably) are in desperate need for the colder months. You have probably worked out, dear reader, that I did not colour in the pictures because most things are going to be black! It may be boring for some, but I love the simplicity and elegance (ha, not that I am elegant in any way!) of black. No fussing over colours clashing, or pattern mixing, or worrying it won't work with leopard print ;)
The bottom one is a maybe project. I have made a peplum blouse already in black (again, unblogged at present) and I like it a lot. So I thought I might make one in white as I have a few white bed sheets in the stash, all pretty crisp if you follow me. But I also have some black pin dot poly cotton that is in the stash too. Decisions, decisions! I will have to get back to you on that one.
Moving on to Underneath it all
Much to the disappointment of the OH, this is a dressing gown not an outfit for reenacting Mortal Kombat. I will save myself many blushes when an early Saturday morning delivery man comes knocking at the door by making a nice cotton dressing gown. I have some sheets in my stash earmarked for this. I considered making one in fleece. I don't want to get in the habit of living in it though so maybe stick to a slightly less cozy one!
Last of all - Tender Tootsies
If I have time, I will start a pair of socks. They might not be finished, but I will at least try to start some! I have the stuff to make them all in the stash, and a pattern (a REALLY easy one!) so maybe this one will sneak in as a little bonus! Perhaps a lunch break project?
Well I guess that is all but 2 categories, but I think this is an achievable amount of items for the period of time...and if I go a little bit over - never mind!
It is the taking part that counts after all.
Is anyone else up and running with this yet?
Bit late posting this up as I was away on holiday last week (Switzerland; It was fabulous!) but here are my initial plans for FESA 2014 with bad illustrations to make up for the tardiness ;)
I am starting off cautiously, as I can always do more if there is time, so I won't be listing items for all categories.
First up is - Fashionable Foundations for Frosty Weather
Right, once you're finished giggling over the pics (it would have taken me weeks to draw these on a computer so I did it the old fashioned way with a pen, paper, and scanner) they are trousers btw!! :)
They will both be made with Simplicity s2700, with the pair on the right modified from the original pattern. LHS will be made up in black corduroy (in stash ready and waiting) with the heavier fabric supporting the wider leg. I hope. The RHS will be made from a grey stretch gaberdine, made to be more tightly fitted around the butt/thigh area.
This picture is my only imagining of how to draw the "Tania culotte" style culottes. I have yet to blog about it but I made my own pattern up for these, and have a lightweight summer pair in the wardrobe already. I am thinking a nice tweed? Lined? All up in the air at the moment, but I have been ogling some nice wool blends on eBay, and tossing up the pros and cons of making a pair of silky bloomers to wear underneath slip style, or just lining them making them cold weather only. Any help/opinions greatly welcomed here!
Next is Chic Chemises for Cooler Climates
Well the top one is meant to be a Myrna cardi (By the fabulous Andi Satterlund). I have one on the needles already in a charcoal grey, and it is a really great pattern, especially for a less advanced knitter such as myself. I have yarn to try and make a second one in black before FESA is over, but no promises!
The middle is a long sleeved t-shirt, which I will make with my own pattern, and perhaps also have a go with one of the free patterns available that I am probably one of the last bloggers to try! I love a plain black tee, and a longer sleeved selection (3/4 probably) are in desperate need for the colder months. You have probably worked out, dear reader, that I did not colour in the pictures because most things are going to be black! It may be boring for some, but I love the simplicity and elegance (ha, not that I am elegant in any way!) of black. No fussing over colours clashing, or pattern mixing, or worrying it won't work with leopard print ;)
The bottom one is a maybe project. I have made a peplum blouse already in black (again, unblogged at present) and I like it a lot. So I thought I might make one in white as I have a few white bed sheets in the stash, all pretty crisp if you follow me. But I also have some black pin dot poly cotton that is in the stash too. Decisions, decisions! I will have to get back to you on that one.
Moving on to Underneath it all
Pants. Panties. Knickers. Whatever you call your undercrackers, they are essential for protecting one's bottom against the chill. I happen to need some new ones, so this is very timely. I have a self drafted pattern, but I might try out the Rosie Ladyshorts, or the Sew Vera Venus grannie pants. Or both. I have the elastics in my stash, and have some jersey floating about, so perhaps just treat myself to 1m of a patterned jersey to throw in with the black.
Those Cozy Nights
Those Cozy Nights
Much to the disappointment of the OH, this is a dressing gown not an outfit for reenacting Mortal Kombat. I will save myself many blushes when an early Saturday morning delivery man comes knocking at the door by making a nice cotton dressing gown. I have some sheets in my stash earmarked for this. I considered making one in fleece. I don't want to get in the habit of living in it though so maybe stick to a slightly less cozy one!
Last of all - Tender Tootsies
If I have time, I will start a pair of socks. They might not be finished, but I will at least try to start some! I have the stuff to make them all in the stash, and a pattern (a REALLY easy one!) so maybe this one will sneak in as a little bonus! Perhaps a lunch break project?
Well I guess that is all but 2 categories, but I think this is an achievable amount of items for the period of time...and if I go a little bit over - never mind!
It is the taking part that counts after all.
Is anyone else up and running with this yet?
Tuesday, 26 August 2014
FESA 2014
It's that time of year again when the weather is starting to take a turn for the worse, and thoughts of cozy knits and warm trousers begin to replace the summer dresses. We have had a spectacular summer here in the UK with lots of lovely sunny days, although as I write this it is raining (as it has been all day - booo!). Now it is coming up to September, it gets chillier, and I have a particularly dire wardrobe when it comes to the colder seasons. I spend a lot of time indoors, and I'm not afraid of central heating bills....so I never really put away my light dresses and t-shirts, I just add a cardi over the top. Only when I have to leave the house do I remember why people have winter wardrobes - I thus spend an hour staring at my clothes trying to figure out what I could possibly wear and avoid a soaking or getting frozen half to death. But no more! I am finally going to be sensible and sort it out, as you know, colder weather does make up approximately 8 months of the year here!
If you're unfamiliar with the FESA, it is hosted this year by Sarah over at The Creative Perfectionist and Lisette (formerly of What Would Nancy Drew Wear?) of That 70's Sew.
There are 7 categories -
1. Fashionable Foundations For Frosty Weather
2. Chic Chemises For Cool Climates
3. Fabulous Frocks
4. Underneath It All
5. Tender Tootsies
6. Those Cozy Nights
7. Baby It's Cold Outside
FESA runs from September 1st for 8 weeks, so plenty of time to get sewing and knitting!
I'm still trying to decide upon my plans and will post them up soon.
Is anyone else joining in this year?
FESA runs from September 1st for 8 weeks, so plenty of time to get sewing and knitting!
I'm still trying to decide upon my plans and will post them up soon.
Is anyone else joining in this year?
Sunday, 4 May 2014
Sew For Victory!
Well I thought I would have to miss out on this but as the lovely Rochelle kicked back the deadline by a week I had enough time to get my project photographed. I made it at the beginning of April so it is just laziness that meant it didn't get photographed before....oh well!
First up my inspiration. I pinned a few different patterns on Pinterest HERE.
If you know me well, you will know I am all about the shirt-dress! I L-O-V-E them! So it seemed at first that this would be a no brainer. But then I decided that it wouldn't be anything special to crank out a TNT pattern for a sew-along. As I am not a frivolous sewer, I had to make something I would wear, and preferably that I need. One of my pins answered that, I needed a blouse!
So my inspiration is this -
And from the four on here I went for a version of the bottom right hand one.
I didn't have a pattern, so I kind of maybe just bodged one....and by bodged, I mean really bodged!
However, it did work! I wanted to have some kind of bust dart for a bit of shaping, and some darts in the back of the blouse too. As I am a lazy SOB, I didn't want to change up my overlocker threads and french seamed it. Which was okay until I realised I could do with taking the sides in a bit (read as quite a bit). As a result my back darts are too deep but a belt/ my hair disguises this nicely ;)
I would also like to note that I do not have a suitable looking skirt so have opted to make this a contemporary look, Rochelle had mentioned about doing so and I think it is a good idea, especially for separates. It shows that a vintagey pattern is not a one trick pony, and allows you infinitely more choice when wearing it.
So eek! Here it is! I don't like pics of myself, they remind me about how fat I am that I try to forget ;)
Well I guess I should have ironed it! But never mind. White on white is hard to see in pictures but I decided to only have the frilly trim round the neckline, it would have been a bit much round the arms too I think. I trimmed either side of the button placket with lace and sewed a 3mm white ribbon on top to give it a little something extra. The buttons were in my stash having bought them for my doomed Mad Men Challenge dress (I'm not ready to talk about that yet haha!) and in true make do and mend style, the fabric used to be a flat bed sheet. It is unlikely to have been used much before it ended up in the charity shop, the fabric hasn't gone "old bed sheet soft" yet and it is still very bright white.
Well, I'm glad to have joined in on Sew for Victory, big thanks to Rochelle for doing it again :)
Any one else joined in this time?
Thursday, 1 May 2014
The Seamless Pledge 1 Year On
Well, I can't believe it has been (ok... just over!) a whole year since I made this statement -
I, Lucy Lovell, take the Seamless
Pledge, and vow not to buy any new clothes (except bras) and stick to
the rules laid out below, until I sort myself out and am wearing a UK
size 12 clothes. Once I have dropped the 2 dress sizes necessary I will
re-assess my pledge and set another target. I would like to be free from
the tyranny of corporation and this pledge is one facet of a
multi-sided endeavour to become self sufficient and stick it to the man.
I would love for you to tell me your thoughts on this issue.
Sounds a bit cringe worthy now!
So, I'm not a size twelve, but I would like to re-pledge now, and this time, it's FOR LIFE!!
If you know me, you might know that for the past year, I have made all my own clothes, apart from a coat from a charity shop, two new bras, and a three pack of tights. As I said in my original post HERE, I don't buy a great deal of clothes anyway, but I was amazed at how few items I picked up in charity shops too! I am definitely not a shopper. My other half even laughed at me because not only was I not buying clothes, I was being super mindful of my fabric use too!
Off the top of my head I have made 2 shirt dresses, 1 kimono sleeved jersey dress, 1 mystery jersey fabric fitted dress, 1 pencil skirt with the remains of the mystery jersey, 1 cotton pj bottoms, 1 jersey pj top, 3 black tshirts, 1 pair of trousers, 1 smart skirt, 1 sew for victory blouse, and 1 unfinished pair of shorts. Oh and a few pairs of knickers :D I also upcycled a dress into a skirt. Seeing all this written down feels like a lot, but it makes up over half my wardrobe!
The tshirts are to replace 6 year old tshirts that all have holes in now (one is really shocking!) and the only other pair of trousers I have are in a state (chub rub thigh holes, so not classy!) and should be de-zipped and turned to rags.
I also used old curtains for one shirt dress, and old bed sheets for the pj bottoms and the blouse.
Looking at my previous pledge you can see I omitted bras, and I also was not considering shoes in this either. Bra making for hefty bosoms is something I am very cautious about as I don't want to suffer any back pain or lasting damage, so for now I will continue to purchase bras from M&S, but I will only do so when it is absolutely necessary. Not that I'm a frivolous bra buyer anyway!
As for shoes, well I hope to be able to save my pennies/beg father Christmas to be able to go on a shoe making workshop like Daniela from Ela Sews and Doesn't Sleep did a while ago. I will also make sure that I get maximum use out of my shoes by having them re-heeled when they wear out, and taking any other steps to prolong their lifespan.
I feel so strongly about not making a contribution to the evils of fast fashion and aiding (by consumption) in the poor quality of life that comes as standard for garment workers producing all the RTW out there. I missed out on the "who made it" event on the anniversary of the Rana Plaza tragedy, but I would have shouted loud and proud that it is ME!! who made my outfit. They might not be perfect, but I am happy to say I didn't exploit slave labour for cheap clothing. In a very sweet moment my other half told me that it was inspiring to him that I "go to all this effort", whilst I don't see it as effort, it did make me think that a) he is very lovely, and b) in "real life" I do not know anyone who sews all their own clothes, and even amongst the sewers there are none who regularly make things which is just crazy to me!
Any way, here are a couple of links I think are helpful and relevant here -
War on Want
Slow Fashion Forward
The Ethical Fashion Forum
So, I'm not a size twelve, but I would like to re-pledge now, and this time, it's FOR LIFE!!
If you know me, you might know that for the past year, I have made all my own clothes, apart from a coat from a charity shop, two new bras, and a three pack of tights. As I said in my original post HERE, I don't buy a great deal of clothes anyway, but I was amazed at how few items I picked up in charity shops too! I am definitely not a shopper. My other half even laughed at me because not only was I not buying clothes, I was being super mindful of my fabric use too!
Off the top of my head I have made 2 shirt dresses, 1 kimono sleeved jersey dress, 1 mystery jersey fabric fitted dress, 1 pencil skirt with the remains of the mystery jersey, 1 cotton pj bottoms, 1 jersey pj top, 3 black tshirts, 1 pair of trousers, 1 smart skirt, 1 sew for victory blouse, and 1 unfinished pair of shorts. Oh and a few pairs of knickers :D I also upcycled a dress into a skirt. Seeing all this written down feels like a lot, but it makes up over half my wardrobe!
The tshirts are to replace 6 year old tshirts that all have holes in now (one is really shocking!) and the only other pair of trousers I have are in a state (chub rub thigh holes, so not classy!) and should be de-zipped and turned to rags.
I also used old curtains for one shirt dress, and old bed sheets for the pj bottoms and the blouse.
Looking at my previous pledge you can see I omitted bras, and I also was not considering shoes in this either. Bra making for hefty bosoms is something I am very cautious about as I don't want to suffer any back pain or lasting damage, so for now I will continue to purchase bras from M&S, but I will only do so when it is absolutely necessary. Not that I'm a frivolous bra buyer anyway!
As for shoes, well I hope to be able to save my pennies/beg father Christmas to be able to go on a shoe making workshop like Daniela from Ela Sews and Doesn't Sleep did a while ago. I will also make sure that I get maximum use out of my shoes by having them re-heeled when they wear out, and taking any other steps to prolong their lifespan.
I feel so strongly about not making a contribution to the evils of fast fashion and aiding (by consumption) in the poor quality of life that comes as standard for garment workers producing all the RTW out there. I missed out on the "who made it" event on the anniversary of the Rana Plaza tragedy, but I would have shouted loud and proud that it is ME!! who made my outfit. They might not be perfect, but I am happy to say I didn't exploit slave labour for cheap clothing. In a very sweet moment my other half told me that it was inspiring to him that I "go to all this effort", whilst I don't see it as effort, it did make me think that a) he is very lovely, and b) in "real life" I do not know anyone who sews all their own clothes, and even amongst the sewers there are none who regularly make things which is just crazy to me!
Any way, here are a couple of links I think are helpful and relevant here -
War on Want
Slow Fashion Forward
The Ethical Fashion Forum
Thursday, 13 March 2014
7 Things You can Learn From The Sewing Industry
Hello everyone! Today I thought I would share with you a few tips that I have picked up whilst sewing in an industrial setting. I am no true veteran, nor am I an expert, but these are a few things I have picked up along the way that you might find useful :)
1 - Don't use as many pins!
I know that setting in a sleeve is best done with careful pinning, but for the most part, us home sewers are used to pinning everything abundantly. At work I have 12 pins in my pincushion (four of them are being used to attach my secret T-Rex to the other side of my frilly pincushion ;) ), they get used very rarely and off the top of my head I can only think of 3 or 4 reasons I use them. Most of the time it is on knee pad pockets (I work with industrial workwear mostly), and second most often is to hold something out of the way that keeps flopping down into my sewing area. If you pin everything, I challenge you to have a go at doing some straight seams without pins, like the sides of a skirt, or a trouser leg. I made a pair of pj bottoms the other day and didn't pin them at all!
2 - Use a craft knife instead of a seam ripper.
It is scary to put a knife to fabric the first few times, and I urge you to exercise caution when you are getting used to it - I don't want the blame for sliced fingers or sliced garments! But when you are unpicking a whole hem, especially on heavier fabrics, a craft knife just glides straight through and makes small work of overlocking etc. (Maybe the Sewing Bee contestants could have done with this tip!) Just start off by gently "stroking" the stitching with the blade and gradually increase the pressure until you are comfortable with using a bit more gusto. Be careful, but give it a try! Saves so much time in the long run.
3 - Replacing a zip is not scary!
Seriously, don't throw away those favourite jeans, or that cute jacket because the zip has broken. Take your time and remove the broken one, look at how you are taking it apart, and put a new one in. Once you get the hang of it, it will be no more daunting that putting one in a garment made yourself.
4 - Likewise for taking in trousers!
If you want to extend the life span of a pair of trousers that are getting a little bit loose, or just improving the fit of a new pair, then taking them in is a must. The easiest way is to unpick the waistband 3-4 inches either side of the butt seam. Then taper from about 2 inches above the crotch seam all the way to the top of the waistband. Fold the excess waistband to the inside, sew a seam down it, and sew it back round the trousers, folding the flap of taken in fabric the opposite way to the excess waistband fabric to minimize bulk. If you are certain you won't be gaining a few pounds then by all means cut it off! This will only work to a maximum of 2 inches on the fold (4 inches out of the waistband) as it starts to look a bit weird after that.
5 - Mark your hems with chalk.
This goes along with the use less pins really, but when taking up sleeves or trouser legs, just mark the fold line with a few dashes of chalk. No stopping to take pins out, just fold over and go!
6 - Put your pedal to the metal...
If you ever get the chance to use an industrial machine then you will notice how much faster it is than a domestic. Scary, but once you're used to it, sewing at home just seems to go so slow! I would reccommend to anyone that they practise going a bit faster, even if it is just for straight lines, it will get your garment together so much quicker allowing you to be more productive in the long run.
7 - Have a ruler put on your sewing table.
If you're lucky enough to have a dedicated sewing space with a table not used to host dinner parties, I would recommend getting either a transfer of a tape measure put on the edge of your table, or have a meter ruler attached. It makes it so much easier to check inside leg measurements (I actually have mine sharpied onto my sewing table at home!), zipper lengths, button widths... you name it! It is a small thing that will make thing a bit easier in the long run. It also has the added advantage of not stretching out like a tape measure will after time.
Well that's all I can think of at the moment, I hope some of them are at least a little bit of use to somebody! Feel free to leave more suggestions in the comments :)
Saturday, 22 February 2014
Stripey Dress - Sweater Refashion
Hello!
Thought I would share a refashion that I did ashamefully long time while ago, before I got my overlocker last summer (Okay, this is from 2012, I admit it!!). It started life as a sweater type thing, huge with long sleeves. I was going to take pictures for a tutorial but I obviously forgot!
All I did really was to get a vest top that fits well and draw around it with some chalk, not including the straps and extending the bottom to make it dress length... okay, short dress length!
I then cut another panel out, around 6" wide. I cut up the middle of the dress and sewed in the extra panel. This made it not quite so much like being in a sausage skin, super tight fitting dresses are only for the slim and alas, I am not one of those girls!
Here is a close up of the straps, I cut out four long rectangles from one of the sleeves, and then sewed each pair together with the right sides together. I shaped one end to be rounded, just freestyled it as total perfection was not necessary! I then turned them inside out and attached them to the dress. To ensure they were the right length I sewed on both straps at the back and then trundled off into my bedroom to try it on and pin the straps in place at the front, I just looked in the mirror to gauge how even they were. They then got sewn down and buttons sewn on for decoration only. As you can see the raw edges aren't finished, they won't fray though so it's ok.
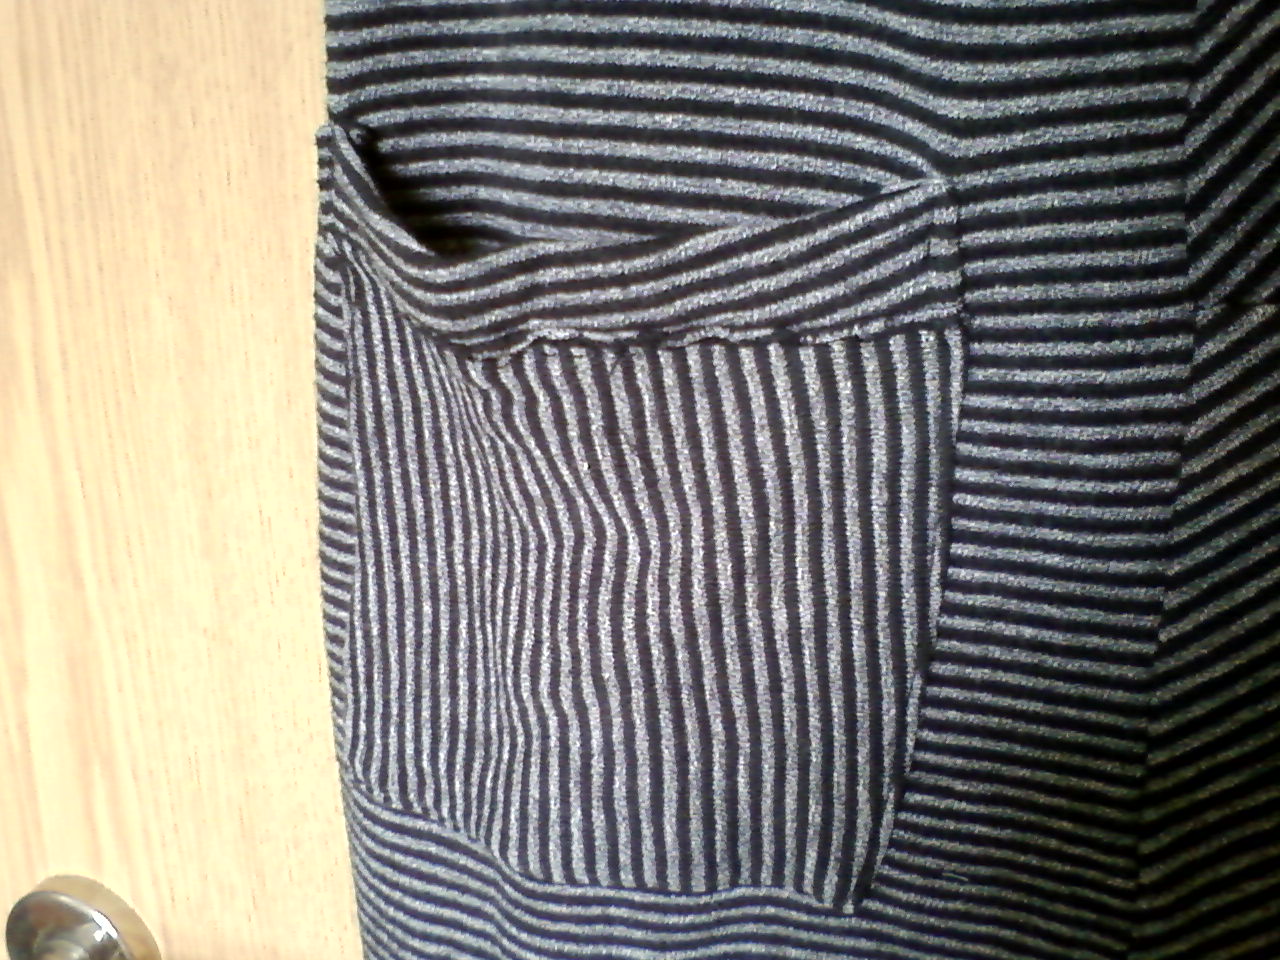
I then added some pockets because I love skirts and dresses with pockets on. They are infinitely more useful that way and if it is just casual every day wear then practical is always good! I cut out the two pocket shapes (I think I may have actually made a paper template shock horror!) and then a rectangular piece to strengthen and neaten the open part - I just sandwiched the pocket in there.
I sewed the pockets on using the regular patch pocket method.
So it was as easy as that! Don't be scared to refashion old/ thrifted clothes, even if they get messed up you haven't lost anything except your time and maybe a couple of quid! You will have gained experience even with something that turns out wrong and that alone can be worth it :)
Be brave and have fun!
Thought I would share a refashion that I did a
All I did really was to get a vest top that fits well and draw around it with some chalk, not including the straps and extending the bottom to make it dress length... okay, short dress length!
I then cut another panel out, around 6" wide. I cut up the middle of the dress and sewed in the extra panel. This made it not quite so much like being in a sausage skin, super tight fitting dresses are only for the slim and alas, I am not one of those girls!
Here is a close up of the straps, I cut out four long rectangles from one of the sleeves, and then sewed each pair together with the right sides together. I shaped one end to be rounded, just freestyled it as total perfection was not necessary! I then turned them inside out and attached them to the dress. To ensure they were the right length I sewed on both straps at the back and then trundled off into my bedroom to try it on and pin the straps in place at the front, I just looked in the mirror to gauge how even they were. They then got sewn down and buttons sewn on for decoration only. As you can see the raw edges aren't finished, they won't fray though so it's ok.
I then added some pockets because I love skirts and dresses with pockets on. They are infinitely more useful that way and if it is just casual every day wear then practical is always good! I cut out the two pocket shapes (I think I may have actually made a paper template shock horror!) and then a rectangular piece to strengthen and neaten the open part - I just sandwiched the pocket in there.
I sewed the pockets on using the regular patch pocket method.
So it was as easy as that! Don't be scared to refashion old/ thrifted clothes, even if they get messed up you haven't lost anything except your time and maybe a couple of quid! You will have gained experience even with something that turns out wrong and that alone can be worth it :)
Be brave and have fun!
Tuesday, 10 September 2013
The Polka Dot Trousers Conundrum
Hey guys!
I have been having a little internal dilemma for a few months now, and that is whether or not I can pull off polka dot trousers. The fabric I have is navy with small white dots on, since I got it all I can think of is trousers, trousers, trousers! I worry that it would be too faddy, or silly on a bigger figure as opposed to the more slender wear anything and look good brigade.
So I did a bit of Pinterest searching and found a few inspiration pics -
So I guess this is the kind of look I'm going for, wide leg, or, if the fabric will hold it, a kick flare style. I will have to some how check to see if it can hold it, but I have no similar weight fabric for a muslin, and am reluctant to just go for it! Maybe I could just cut a wide leg and try pinning it into shape? Any suggestions would be most welcome!
I still have no idea if they will look silly, or if I will just feel uncomfortable in them, I try to rationalise it by telling myself that I wear patterned skirts, so patterned trousers shouldn't be too much of a difference!
Anyone else got any polka dot/ patterned trousers? If so, or even if not, were you reluctant to wear trousers that weren't plain?
P.S. Just noticed that this is my 100th post! Took long enough to get here ha ha!
I have been having a little internal dilemma for a few months now, and that is whether or not I can pull off polka dot trousers. The fabric I have is navy with small white dots on, since I got it all I can think of is trousers, trousers, trousers! I worry that it would be too faddy, or silly on a bigger figure as opposed to the more slender wear anything and look good brigade.
So I did a bit of Pinterest searching and found a few inspiration pics -
So I guess this is the kind of look I'm going for, wide leg, or, if the fabric will hold it, a kick flare style. I will have to some how check to see if it can hold it, but I have no similar weight fabric for a muslin, and am reluctant to just go for it! Maybe I could just cut a wide leg and try pinning it into shape? Any suggestions would be most welcome!
I still have no idea if they will look silly, or if I will just feel uncomfortable in them, I try to rationalise it by telling myself that I wear patterned skirts, so patterned trousers shouldn't be too much of a difference!
Anyone else got any polka dot/ patterned trousers? If so, or even if not, were you reluctant to wear trousers that weren't plain?
P.S. Just noticed that this is my 100th post! Took long enough to get here ha ha!
Sunday, 8 September 2013
DIY Dressform
Hello everyone, this is another very quick post, and it is in response to the lovely Kelly over at Make, Sew, Do who asked in a post I just read, have you ever made a dressform?
The answer to this is yes! I made one a couple of years ago. Sadly I found the gaffer tape method to be a poor choice for keeping its shape and it has been disassembled and recycled/binned since the beginning of the year due to its lack of function.
So just for a laugh at my own expense, here is the evidence!
Apologies for the middle finger, I was not wanting to have a photo at the time!
Maybe one day I will make a gummed paper version, although maybe setting aside a little every month for a proper one some time next year is a better plan :)
The answer to this is yes! I made one a couple of years ago. Sadly I found the gaffer tape method to be a poor choice for keeping its shape and it has been disassembled and recycled/binned since the beginning of the year due to its lack of function.
So just for a laugh at my own expense, here is the evidence!
Apologies for the middle finger, I was not wanting to have a photo at the time!
Maybe one day I will make a gummed paper version, although maybe setting aside a little every month for a proper one some time next year is a better plan :)
Friday, 30 August 2013
Man Bag - A Present For My Dad
For my Dad's birthday, I had bought him a book which he had wanted for ages. However, it was the day before his birthday and it still hadn't arrived (despite ordering it almost two weeks in advance). I was quite upset at the prospect of turning up empty handed so I decided at 8pm that night (as all sane people do) I would make a quilted cartridge bag. I sewed my butt off into the early hours of the morning (as all sane people with work at 7am the next morning do) and by 3am it was almost complete. It turned out a bit larger than I had anticipated and it looked a bit too much like a handbag.
Despite my concerns my Dad loved it, and even took it on holiday with him the following week with some kind of fishing apparatus in! I was so pleased that he liked it so much, it isn't perfect but the construction contained many firsts for me.
As you can see from the outside, there is brown piping round the edges. I had never used piping before and I am now a big fan. It was simpler than I thought and gives structure and a nice looking finish. The green fabric is some sort of canvas type stuff, I didn't buy it so I couldn't say what it is exactly.
On the inside the bag is lined in a heavy brown cotton twill type fabric. Again, I didn't buy it so I don't know what the retail name for it is. As the bag was full of fishing paraphernalia when I took the photos I don't have a picture of the quilted inside. This was another first. Not a difficult thing to do, but I wasn't the neatest and my diamond shapes are uneven. The wadding I used was a bit too thick for the job as well. I ran out of bias tape to trim the edges of the bag opening so when I put the quilted inner piece inside the green outer piece, I just folded the green edge over, and over again to hide the raw edges and top stitched it together.
You can see a peek of the strap, I just stitched a length of the bias tape onto some of the green fabric, this was done before I thought about wanting to trim the edge of the bag opening - silly me! Although in my defence it was into the am hours at this point!
I have now been requested to make another one in black and pink for Gemma (my step mum) so I will get some better photos and take some of the inside of the bag. This will be getting on for Xmas time though so keep an eye out in December.
Have you ever made a man bag? I'd love to hear about other adventures into masculine bag sewing!
Despite my concerns my Dad loved it, and even took it on holiday with him the following week with some kind of fishing apparatus in! I was so pleased that he liked it so much, it isn't perfect but the construction contained many firsts for me.
As you can see from the outside, there is brown piping round the edges. I had never used piping before and I am now a big fan. It was simpler than I thought and gives structure and a nice looking finish. The green fabric is some sort of canvas type stuff, I didn't buy it so I couldn't say what it is exactly.
On the inside the bag is lined in a heavy brown cotton twill type fabric. Again, I didn't buy it so I don't know what the retail name for it is. As the bag was full of fishing paraphernalia when I took the photos I don't have a picture of the quilted inside. This was another first. Not a difficult thing to do, but I wasn't the neatest and my diamond shapes are uneven. The wadding I used was a bit too thick for the job as well. I ran out of bias tape to trim the edges of the bag opening so when I put the quilted inner piece inside the green outer piece, I just folded the green edge over, and over again to hide the raw edges and top stitched it together.
You can see a peek of the strap, I just stitched a length of the bias tape onto some of the green fabric, this was done before I thought about wanting to trim the edge of the bag opening - silly me! Although in my defence it was into the am hours at this point!
I have now been requested to make another one in black and pink for Gemma (my step mum) so I will get some better photos and take some of the inside of the bag. This will be getting on for Xmas time though so keep an eye out in December.
Have you ever made a man bag? I'd love to hear about other adventures into masculine bag sewing!
Thursday, 22 August 2013
Patchwork Pot Holder
The Lincoln WI has its own offshoot craft group one Saturday a month at a local community cafe called Revival. Sometimes we bring our own projects in to work on, other times we have guests who teach us something cool. One Saturday it was a patchwork workshop, which I was very much looking forwards to as patchwork is something I haven't delved much into due to its fiddly and time consuming nature (or what I perceive to be time consuming and fiddly!).
We learnt a cool technique that can be done by hand (which we were) or machine. You basically sew two squares right sides together round the edges, snip a cross through the back, press, repeat with a larger square - et voila! You will have a fancy looking patchwork square!
You then pin a patchwork - wadding - backing sandwich together and stitch through all the layers in a manner pleasing to you.
I chose to add bias binding to mine and stupidly did not round the corners to make it look neater. It has dodgy top stitching but I will lie and say it adds homemade charm ;)
It has a little hanging loop on one corner as a pointless accessory due to its home in a drawer. I could tell additional lies that it enhances the aesthetics of the piece and makes chucking it in with the tea towels so much easier... but my nose doesn't need to get any bigger ha ha!
I will do a photo step by step tutorial thing on this method as it will be easier to follow than my mumbo jumbo description above.
If you haven't done patchwork before I highly recommend having a go this way, the speed of the results will be encouraging, and uber high precision is not as important as hexies or such like.
Adios! xxx
We learnt a cool technique that can be done by hand (which we were) or machine. You basically sew two squares right sides together round the edges, snip a cross through the back, press, repeat with a larger square - et voila! You will have a fancy looking patchwork square!
You then pin a patchwork - wadding - backing sandwich together and stitch through all the layers in a manner pleasing to you.
I chose to add bias binding to mine and stupidly did not round the corners to make it look neater. It has dodgy top stitching but I will lie and say it adds homemade charm ;)
It has a little hanging loop on one corner as a pointless accessory due to its home in a drawer. I could tell additional lies that it enhances the aesthetics of the piece and makes chucking it in with the tea towels so much easier... but my nose doesn't need to get any bigger ha ha!
I will do a photo step by step tutorial thing on this method as it will be easier to follow than my mumbo jumbo description above.
If you haven't done patchwork before I highly recommend having a go this way, the speed of the results will be encouraging, and uber high precision is not as important as hexies or such like.
Adios! xxx
Tuesday, 20 August 2013
Cute Pencil Case
Hello everyone!
I'm sure you have seen those picture tutorials on Pinterest where there is no instructions just a series of self explanatory photos? Well here is my attempt at one!
It is a bit wonky (as comes as standard with my sewing) but considering I just winged it and drew an estimated shape on some a4 paper, it isn't too bad!
I made the bias binding myself from some scrap red linen.
The inside shows my wonky quilted effect lines, I didn't think to use a red bobbin, clearly I was having a moment...
The bottom is a bit misshapen as well.
Overall I am pleased with the result, not bad for a 100% winging it project! I also just really needed a pencil case for going to OU tutorials, having loose pens rolling round in my bag didn't seem like a good idea.
I would like to make another one at some point, perhaps a bit bigger though. They could be turned into make up bags, glasses cases, even a clutch bag. If you would like to see the original pin, it is on my projects board HERE.
I'm sure you have seen those picture tutorials on Pinterest where there is no instructions just a series of self explanatory photos? Well here is my attempt at one!
It is a bit wonky (as comes as standard with my sewing) but considering I just winged it and drew an estimated shape on some a4 paper, it isn't too bad!
I made the bias binding myself from some scrap red linen.
The inside shows my wonky quilted effect lines, I didn't think to use a red bobbin, clearly I was having a moment...

The bottom is a bit misshapen as well.

Overall I am pleased with the result, not bad for a 100% winging it project! I also just really needed a pencil case for going to OU tutorials, having loose pens rolling round in my bag didn't seem like a good idea.
I would like to make another one at some point, perhaps a bit bigger though. They could be turned into make up bags, glasses cases, even a clutch bag. If you would like to see the original pin, it is on my projects board HERE.
Monday, 12 August 2013
Sewing And Body Image - My Two Pence
Sewing blogs periodically come around to this issue, and I guess I am jumping on the proverbial bandwagon now as my own body is something I am particularly struggling to deal with at the moment.
Last week I read THIS article on the Guardian website, written by a lovely blogger I follow, Karen at Did You Make That? where she talks about how making clothes from scratch freed her from the tyranny of ready to wear sizing numbers (12, 14, 16 etc) and let her appreciate the uniqueness of her body, perfect looking to others or not.
I have to confess my own thoughts couldn't be more different. Those tape measure numbers were/are
horrible. The first time I sized myself up for a pattern (free from Prima magazine, a much appreciated gift from my mother) I cried. At that time I was fitting into a size 14/16 bottom half and my top half varied with fabric due to my overly large bra size. The bloody tape measure told me to cut out the pattern larger than they had graded for. And the patterns go up to size 20. So I cut out the 20 figuring I would just use a smaller seam allowance and basted the bodice together, then basted on the skirt. I tried it on and it turned out to be huge. Really huge! I was relived by this but also confused at the relationship between the tape measure and the non stretch polycotton sack in front of me.
In time I came to understand about ease, big four patterns being very generous with the ease and how a perfect fit involves tweaking everything in relationship to my own shape and proportions. I also realised just how much the high street likes to massage the fragile egos of their clientele. I mean everyone knows a M&S 12 is much larger than a Topshop 12, but most people don't realise how much these sizes differ from pattern sizes.
Even now though, despite improved knowledge, I still get a sense of deep dread when I read those numbers off. It makes everything so much more real. My work trousers are sized in cm, this is just as depressing, it is a big number. I know that I am overweight, and until some personal circumstances interfered, I was slowly losing the weight to feel better about myself. but those numbers still haunted me. I had a hard time shifting the weight despite a 1 hour, 5 times a week gym habit (and no, I wasn't pigging out) and it took a long time to notice anything. I did track my actual weight loss, but I was primarily concerned with those darn numbers.
I guess what my point is really, is that personally, hiding behind that M&S 14 label (despite knowing its lying ways) makes me feel better that those raw, real, numbers. Even if no label = no evidence of size, I know, and my own opinion on my body is the only one that is truly important.
Thankfully cats do not have these worries!
(This is just an unfortunate angle, my cat is a chunky monkey but not that bad!)
Last week I read THIS article on the Guardian website, written by a lovely blogger I follow, Karen at Did You Make That? where she talks about how making clothes from scratch freed her from the tyranny of ready to wear sizing numbers (12, 14, 16 etc) and let her appreciate the uniqueness of her body, perfect looking to others or not.
I have to confess my own thoughts couldn't be more different. Those tape measure numbers were/are
horrible. The first time I sized myself up for a pattern (free from Prima magazine, a much appreciated gift from my mother) I cried. At that time I was fitting into a size 14/16 bottom half and my top half varied with fabric due to my overly large bra size. The bloody tape measure told me to cut out the pattern larger than they had graded for. And the patterns go up to size 20. So I cut out the 20 figuring I would just use a smaller seam allowance and basted the bodice together, then basted on the skirt. I tried it on and it turned out to be huge. Really huge! I was relived by this but also confused at the relationship between the tape measure and the non stretch polycotton sack in front of me.
In time I came to understand about ease, big four patterns being very generous with the ease and how a perfect fit involves tweaking everything in relationship to my own shape and proportions. I also realised just how much the high street likes to massage the fragile egos of their clientele. I mean everyone knows a M&S 12 is much larger than a Topshop 12, but most people don't realise how much these sizes differ from pattern sizes.
Even now though, despite improved knowledge, I still get a sense of deep dread when I read those numbers off. It makes everything so much more real. My work trousers are sized in cm, this is just as depressing, it is a big number. I know that I am overweight, and until some personal circumstances interfered, I was slowly losing the weight to feel better about myself. but those numbers still haunted me. I had a hard time shifting the weight despite a 1 hour, 5 times a week gym habit (and no, I wasn't pigging out) and it took a long time to notice anything. I did track my actual weight loss, but I was primarily concerned with those darn numbers.
I guess what my point is really, is that personally, hiding behind that M&S 14 label (despite knowing its lying ways) makes me feel better that those raw, real, numbers. Even if no label = no evidence of size, I know, and my own opinion on my body is the only one that is truly important.

Thankfully cats do not have these worries!
(This is just an unfortunate angle, my cat is a chunky monkey but not that bad!)
Wednesday, 22 May 2013
Shorts to Skirt Upcycle
Good afternoon folks!
First of all I would like to say how sad I was to see the news about the terrible destruction in Oklahoma City, such a heartbreaking thing to happen :(
Today I am sharing a little project from last year, you know how on the ball I am with these things. A while back I got some weird shorts from a charity shop (I have since discovered they are gauchos) that I liked but could not find anything to wear with them that looked okay. So I thought sod it, I'm going to have to make them into a skirt. And I did!
I forgot to take a before picture but just imagine some really odd wide legged knee length shorts and you're good to go. I unpicked the inside hems and just re sewed them to meet like a skirt. You have to chop the little crutch bit out but otherwise there isn't much to do other than getting the join smooth.
I top stitched for strength along the front and back seams. There is also one of those vents (? is that the right term?) at the back to allow leg movement - always a useful thing to have! I added the lace at the bottom to jazz it up a bit, I think it works quite well!
I even covered (badly) my raw edges as it was fraying like a S.O.B!
I haven't worn it many times, maybe three or four, but I do still like it. I wore it to my first OU tutorial thinking people would be all smart casual, I might have made too much of an effort....and the top I paired it with is actually a bit see through...oops! So errmm yeah, librarian chic... I rocked it baby ha ha ha! ;)
First of all I would like to say how sad I was to see the news about the terrible destruction in Oklahoma City, such a heartbreaking thing to happen :(
Today I am sharing a little project from last year, you know how on the ball I am with these things. A while back I got some weird shorts from a charity shop (I have since discovered they are gauchos) that I liked but could not find anything to wear with them that looked okay. So I thought sod it, I'm going to have to make them into a skirt. And I did!
I forgot to take a before picture but just imagine some really odd wide legged knee length shorts and you're good to go. I unpicked the inside hems and just re sewed them to meet like a skirt. You have to chop the little crutch bit out but otherwise there isn't much to do other than getting the join smooth.
I top stitched for strength along the front and back seams. There is also one of those vents (? is that the right term?) at the back to allow leg movement - always a useful thing to have! I added the lace at the bottom to jazz it up a bit, I think it works quite well!
I even covered (badly) my raw edges as it was fraying like a S.O.B!
I haven't worn it many times, maybe three or four, but I do still like it. I wore it to my first OU tutorial thinking people would be all smart casual, I might have made too much of an effort....and the top I paired it with is actually a bit see through...oops! So errmm yeah, librarian chic... I rocked it baby ha ha ha! ;)
Sunday, 12 May 2013
Something Old into Something New
Here are a couple of things that older readers might recognise...
This skirt used to be a bit longer and look like THIS. I simply chopped some fabric from the top and sewed on a length of elastic as a waistband.
This skirt used to be a DRESS and was just hanging around unworn in my wardrobe. I chopped it in half and made casing from some scrap white fabric to house some elastic. I also put in a small amount of lining just to stop it being so see through. I wear this regularly now it is in skirt form, so don't be afraid to chop up your hard work into something more suitable - what a waste to have things unworn and unloved!
This skirt used to be a bit longer and look like THIS. I simply chopped some fabric from the top and sewed on a length of elastic as a waistband.
This skirt used to be a DRESS and was just hanging around unworn in my wardrobe. I chopped it in half and made casing from some scrap white fabric to house some elastic. I also put in a small amount of lining just to stop it being so see through. I wear this regularly now it is in skirt form, so don't be afraid to chop up your hard work into something more suitable - what a waste to have things unworn and unloved!
Monday, 6 May 2013
Dress Upcycle
Happy bank holiday everyone! I hope all of the UK readers are enjoying the sunshine! I am stuck indoors doing a lengthy assignment - booo!
Just a quick post to share an upcycle I did in January for a works retirement party. Ignore the dodgy hair, I have no idea what I was thinking with that parting! I do have some before pictures of me wearing this dress 8 years ago but I am way too embarrassed over them and I also can't be arsed to scan in a photo. The dress in question was from when I was a bridesmaid at my Mum's wedding. It was plain purple and was tea length. I looked like thew worlds biggest (quite literally the biggest) muppet. As you can see I chopped off about 8-9inches off the bottom to make it a far more flattering above the knee style, perfect for us shorties who like to give an illusion of being taller. I also handmade 35 black acrylic net flowers with beaded centres that were hand stitched around the bottom.
A bad close up of a flower, simple to make, I'm sure you have seen tutorials for them around the blogosphere/ Pinterest.
All together a successful transformation. Just goes to show that sometimes you really do need to hang onto that thing in your wardrobe for a bit longer!
Just a quick post to share an upcycle I did in January for a works retirement party. Ignore the dodgy hair, I have no idea what I was thinking with that parting! I do have some before pictures of me wearing this dress 8 years ago but I am way too embarrassed over them and I also can't be arsed to scan in a photo. The dress in question was from when I was a bridesmaid at my Mum's wedding. It was plain purple and was tea length. I looked like thew worlds biggest (quite literally the biggest) muppet. As you can see I chopped off about 8-9inches off the bottom to make it a far more flattering above the knee style, perfect for us shorties who like to give an illusion of being taller. I also handmade 35 black acrylic net flowers with beaded centres that were hand stitched around the bottom.
Recognise this Mum?!
You get a better idea of colour here, it also looks a lot shorter when hanging up but I assure you I am only 5ft 2.5" so this is not that bad! I rolled the hem very painstakingly but it looks a bit shoddy so I didn't want to photograph it - good job I'm not on the Great British Sewing Bee isn't it ha ha!A bad close up of a flower, simple to make, I'm sure you have seen tutorials for them around the blogosphere/ Pinterest.
All together a successful transformation. Just goes to show that sometimes you really do need to hang onto that thing in your wardrobe for a bit longer!
Thursday, 25 April 2013
The Pledge
Sounds a bit ominous..... but thankfully I am talking about the Seamless Pledge - check out the funky button!
I stumbled upon this by chance from a cute little blog I ended up at called Heart's Cottage and was intrigued. I will be honest, I don't really buy clothes very often, it stresses me out and my "particularness" means I rarely find anything I like enough to shell out for. I either make from scratch or upcycle existing clothes from my "uurgh, I am not feeling that anymore, I'll shove it in this box and get around to sorting it out later" pile. I will also have to exclude bras from this as I am on the hefty side of things so only NASA engineered over the shoulder boulder holders are good enough to stop my boobage from going wild! So other than the exclusion, perhaps the pledge is a little wasted on me. But I would like to join in anyhow so....
The rules -
I stumbled upon this by chance from a cute little blog I ended up at called Heart's Cottage and was intrigued. I will be honest, I don't really buy clothes very often, it stresses me out and my "particularness" means I rarely find anything I like enough to shell out for. I either make from scratch or upcycle existing clothes from my "uurgh, I am not feeling that anymore, I'll shove it in this box and get around to sorting it out later" pile. I will also have to exclude bras from this as I am on the hefty side of things so only NASA engineered over the shoulder boulder holders are good enough to stop my boobage from going wild! So other than the exclusion, perhaps the pledge is a little wasted on me. But I would like to join in anyhow so....
I, Lucy Lovell, take the Seamless Pledge, and vow not to buy any new clothes (except bras) and stick to the rules laid out below, until I sort myself out and am wearing a UK size 12 clothes. Once I have dropped the 2 dress sizes necessary I will re-assess my pledge and set another target. I would like to be free from the tyranny of corporation and this pledge is one facet of a multi-sided endeavour to become self sufficient and stick it to the man.
The rules -
- No buying new clothes for the duration of your pledge. By new, I mean any new mass-manufactured clothes.
- You can buy second-hand manufactured clothes – so be prepared to get to know your local charity shops awfully well.
- Vintage clothing is a-ok!
- Anything you’ve made by hand is definitely allowed. Get your sewing machines and your kntting needles out, because handmade is definitely in!
Subscribe to:
Posts (Atom)