Tuesday, 27 March 2012

Random Gift Wrapping Ideas

As a Brucey bonus, I found some photos taken last year that were meant to be part of a gift wrap tutorial that never was and decided to post them.

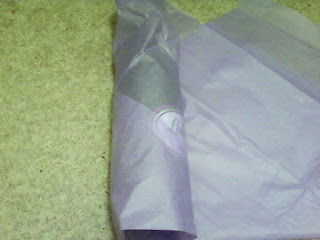
Guess what is in this......
Could be anything right?
But were you expecting it to be this.....?!
Rolling up a folded tshirt makes it so much easier to wrap and disguises it too.


Stacking gifts and then decorating them is a way of getting your gifts to stand out.


Using fabric ribbons adds a luxury touch to gifts, you can also reuse it afterwards!


Well these gifts are all pretty plain but men don't always like things fussy and covered in sequins unless it is lingerie! I know these are all basic ideas but I thought I might as well post them as I had took the photos already :) Perhaps I will encourage someone who usually just covers things in paper to get a bit adventurous.

Before I go there is just one thing left to say - USE DOUBLE SIDED TAPE!!!! (Never fails to impress ;) )

Monday, 26 March 2012

Wine Bottle Wrapping Tutorial

Hello folks! If you know me personally you will most likely have received a spiffy looking gift at some point. Not to toot my own horn too much but I am at one with the gift wrap, I make my gifts look nice because I can't always afford an expensive gift and the wrapping distracts from this ha ha ha!
Here is a little tutorial on how to wrap up a wine bottle, one of those tricky shapes that come up time and time again and you don't always want to leave it naked in a gift bag!
Please ignore the state of my craft room carpet, this was spur of the moment and therefore I didn't get the Dyson out first!

You will need some tissue paper, sellotape, some sort of string, curling ribbon or ribbon and any decorative bits and bobs if you want to bling it up.

STEP 1
Start off with the rectangular piece of tissue paper in front of you with the longer side closest to you. Bring the bottom right corner up towards the top left corner until you have made this funny mountain shape. Turn the paper around so that it is facing you like it is in the picture.


STEP 2
Place your bottle about 2 inches from the bottom of the paper and about a third of the way in from the edge.

STEP 3 
Wrap the paper from the left hand side around the bottle then start rolling the bottle round, take care to keep it fairly tight.

STEP 4
Before you roll it too far along, tuck in the bottom of the paper. It doesn't have to be perfect!

STEP 5 
Fold across the end of the paper as shown. Then finish rolling up the bottle.
Secure the end with a small amount of sellotape, I would normally use double sided but it doesn't seem to hold the tissue paper in place very well. Use a couple more small pieces to secure the bottom, you don't need to go mad with it as the bottle will probably be upright which keeps it secure!

Your bottle should now look something like this!

STEP 6 
Tie the neck of the bottle with the string or ribbon.
Add bling.
You can't see in this picture but I added a large butterfly sequin to the neck where the curling ribbon is tied using sticky pads and glued some sequins onto the tissue paper.


I hope you have found this to be helpful! It isn't anything spectacular but is quick and simple yet looks really pretty. Obviously you can do this in any colour and decorate any way you like :)
I think it would look nice with a wide fabric ribbon tied around the neck in a bow. You could theme it for a wedding or do some whisky 007 style by making it look like a tuxedo with a bow tie! (This is just how randomly my ideas flow, I can't help it!) If anyone actually does this you totally have to let me know!!!

Have fun!

Sunday, 25 March 2012

Jim Woodring Cushion

I made this ages ago, I can't even remember exactly when!
I must state now that I do not own the characters shown, all rights belong to Jim Woodring. 

It's a bit battered now due to going through the wash a few times! It is a Pupshaw and Pushpaw cushion.
Basically I traced an image off the computer screen (I have no printer ink!) and used that to make templates for the faces, I have used black fleece and scraps of the cream fleece the cushion cover is made from to construct an applique style face for each of them. (I cheated and used fabric glue instead of sewing them on.)

I then copied the rest of the picture on to the cushion using a black tulip paint that just had enough left in it - phew! I left it to dry overnight and voila, one Jim Woodring cushion that you won't find in the shops!

Saturday, 24 March 2012

Cherry pies & Lemon and lime tarts

Well, it has been a while! Blogging is now back to business, things are on the up again and although you never really get over the loss of a loved one, it isn't good to stay in that sad place forever.
As I am in need of a good dose of distraction (for more than one reason...I will spill the beans soon enough!) I have been getting my craft on! I have also realised how many projects I never blogged about so I will be posting about them in the next few weeks along with posts about things in progress, recently finished projects and other random bits and pieces in the manner of which I am accustomed to doing :)

Right - enough chat, there is pie to discuss.

A few days ago I got bored and decided to bake, as is necessary. But sometimes one is not in the mood for something as laborious as cake. So I made lemon and lime tarts and cherry pies...

 Mmm cherries!
 The middle one got a bit excited!
Mmm limey.... Lime is totally the best flavour ever!

These were quick and easy, I will provide the sweet shortcrust pastry recipe below, it's pretty self explanatory how to construct pies and tarts, the beauty of it is that you can use plenty of things you probably have in the back of your fridge/cupboard, tarts work well with any marmalade or jam and are a good way to use up the end of a jar. There are so many fabulous jams out there it's a shame the humble jam tart doesn't get sexed up more often! I have used pineapple jam before which is really nice, for the next few batches I'm tempted by blackcurrant jam, cherry jam and coconut jam (known as kaya in some places, look for it in your local Chinese supermarket - it is to die for!).

SWEET SHORTCRUST PASTRY

Makes 8oz - I got 12 tarts and 7 pies from one batch.

8oz plain flour
5oz unsalted butter, softened
2tbsp caster sugar
1 egg yolk

Sieve the flour into a bowl, add the butter and rub into the flour. Stir in the sugar then form into a dough using the egg yolk and about 1tbsp of cold water. Wrap in some cling film or a sandwich bag and chill for 30 minutes before use.
Simples!


Linked up to THINK PINK SUNDAYS @ Flamingo Toes!